
3D rigging of logos for character animation is an important and unique feature required for many brands. In this article, we describe the steps and analyze the details fr the Cademix logo. Further, we describe the principles that improve both your rigging & modeling of a logo for animation.
By Onyinye Obiorah, Cademix Institute of Technology
Introduction: 3D Rigging
3D rigging of logos for character animation is important because logos, which are distinctive emblems of a company’s brand, become unforgettable when they are animated. When we animate logos, a little movement may indeed go a long way.
So, how does one go about doing this? The practice of generating rigs is a common way of animating logos. This takes us to the main question;
What is 3D rigging?
3D rigging is the process of making a skeleton that will determine how a mesh moves. This method of animation is called inherited animation.
After you have your basic rig setup, you can set constraints on your rig as another way of making your workflow simpler.
Let’s look at some basic steps in 3D rigging. You must take note that the names of these steps differ according to the 3d software (some of the popular animation software are Blender, Maya, Cinema 4d, 3ds-max, Autodesk etc. )
Basic Steps in 3D Rigging
- Make a basic armature
- Set up constraints
- Add object modifiers
- Create shape keys
- Set up shape key drivers
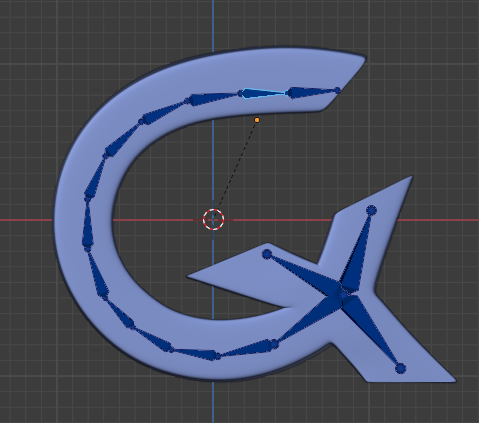
Making a Basic Armature
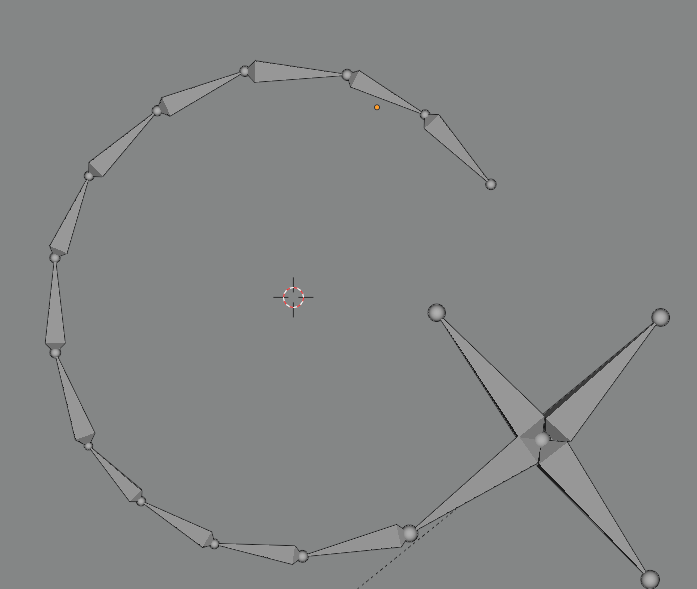
Armatures are skeleton-like structures used for rigging. You can make them either with single or multiple bones.
You can have either a complex or a simple armature. The complexity of your rig will depend on how much deformation you hope to achieve in your animation. Sometimes, you may need just a single bone. With a single bone, you can achieve basic movements in the 3D interface like rotation and change in location in all the different axes (x, y, and z). You may choose to use an uncomplicated rig like this in a model that will not need extensive distortion e.g. a wheel, a door, etc.
However, if you would like to achieve a wider range of deformation, you will need more bones in your armature. You can make your bones attached to each other like a chain (parented) or separate from each other.
Binding or Skinning a rig
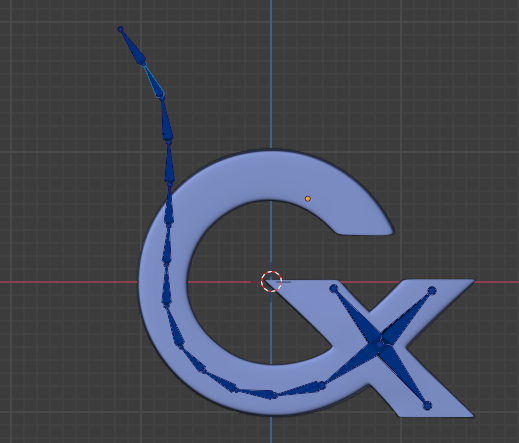
To bind a rig to a mesh, you must parent the mesh to the rig. In addition to this, you will also assign weights to different parts of the mesh to determine how much a mesh is altered by a rig’s movement.
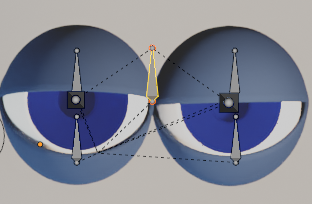
Setting Up Constraints
Constraints control the properties of a rig. They could be self constraints or target constraints. These constraints refine your rig making it easier to work with. Some important applications of constraints include:
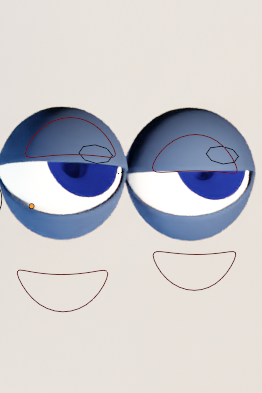
- Eye control e.g. controlling eye movement with a rig that is unbound to the eye mesh, or making the eyes follow an object in your scene.
- The wheels of a car are animated using constraints which make them all move at the same time
- Creating grab or handle points that are easy to locate on an armature
- Making a character grip an object
- Folding the fingers at the simultaneously
- Moving knee and elbow joints without moving the legs or thighs etc.
Kinematics
When parented bones (skeletons linked in a bottom-up chain or a hierarchical sequence) are animated, the term kinematics is used to describe how they will move. Kinematics is another important application of constraints.
- Forward Kinematics
With forward kinematics, you can determine the location of parts of a model at a particular time by using information about the object’s joints, location, and direction.
The good thing is you have a complete grip over each Degree of Freedom (DOF) in forward kinematics. Although you are fully in charge, it may be a tedious task trying to position an element at the bottom of a hierarchical chain.
For example, if you were to make a rig that resembled the upper limb bones, you would have the upper arm bone (humerus), forearm bones (ulnar and radius), wrist bones (carpals – which you probably won’t need to include), hand bones (metacarpals), and fingers (phalanges ), in that order. The upper arm is the parent of the forearm in the hierarchical chain, while the forearm is the child of the upper arm. The forearm is the parent of the hand bones, and the hand bones are children of the forearm, and so on. When you move the forearm, all of the child components down the line move as well. However, when you move a child element e.g. the fingers, it does not result in the movement of a parent element in forward kinematics.
Inverse Kinematics
In inverse kinematics, however, as the child element moves, the parent element is also impacted. For example, when you move the fingers the forearm and upper arm will move as well. It is much easier to animate with inverse kinematics than it is with forward kinematics.
How to Properly Rig Your Character for Animation
- Object Modifiers
You can use object modifiers like lattices to create further deformations to your mesh. They can be useful for the squash and stretch illusion.
- Shape Keys
These are changes of the base mesh which are stored as keys that can be reused. For this reason, they are very useful in facial animations.
- Drivers
They are set up by the animator to control different parts of a rig at the same time. For instance, a single driver could be controlling several facial expressions at the same time.
Animating a Character Without 3D Rigging
You don’t always need to rig a logo/character to animate it. Here are some other methods of animation to consider;
- Moving objects as a whole without a rig
- Deforming objects by changing vertices
- Parenting objects to another objects.
An Overview of Character/Logo Design for 3D Rigging
As animators we are all about bringing characters to life. Although 3D rigging is very important to us in 3d-animation, if we have badly constructed three dimensional, computer generated character, it will works against our aim of making our geometric designs appear real. When you make a 3d computer character or logo, it is called modeling.
Although I am writting mainly on 3D rigging, It is important for us to discuss in passing, details of the character or logo design process. We will do more justice to this in a future topic.
Basic Steps in Character/Logo Design
Basically, your character design process as a modeler will involve the following no matter the design software, animation software or animation program that you use.
- Concept Design
- Model Sheet Creation
- 3D Modeling
- Concept Design
This will provide you, as a designer a clear image of the character or logo to be created. You do this by creating a character from scratch based on a concept that you have derived. You may have got your ideas from a collage of several pictures and maybe a textual description (mood/personality, message, style, etc.). Eventually, you will put all of this together to form your basic character/logo.
- Creating Model Sheets for 3D Rigging of a Logo
We create a model sheet after we have our concept design set in stone. As it were, a model sheet is a document we use in animation to standardize a character’s look, poses, and motions. Consequently, you can refer to model sheet as a character board or a character study.
Furthermore, your design determines how complex your model sheet will be. Hence, your model sheet may be made up of drawings of a front view only for a very simple design. However, if your designs are very complicated, you will need sketches of a profile view (side view), rearview, and 3/4th in addition to the front view.
Importantly, we all consider the above steps crucial in both 3d and 2d animation design.
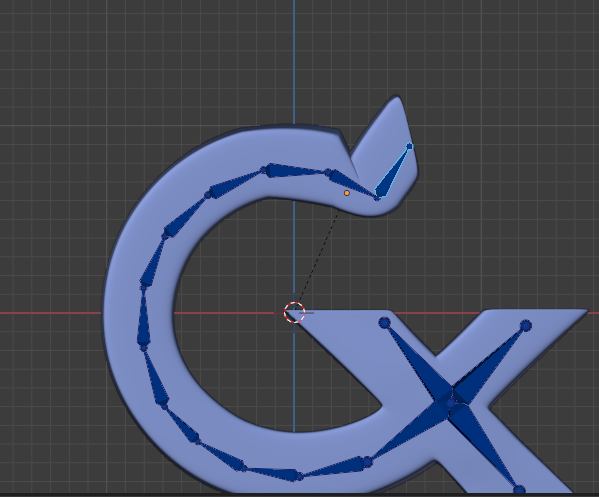
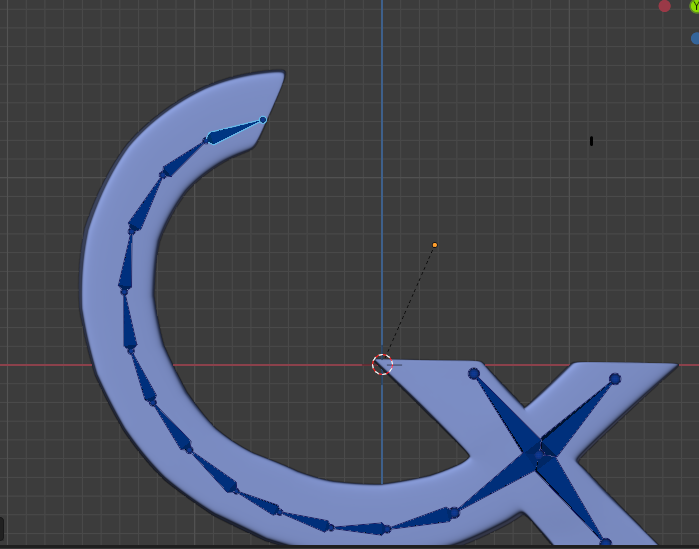
Topology
Topology is critical for 3D rigging of logos in character animation. Your topology defines how readily you will manipulate or distort your mesh in the future.
You should keep these key features in mind when you construct your mesh;
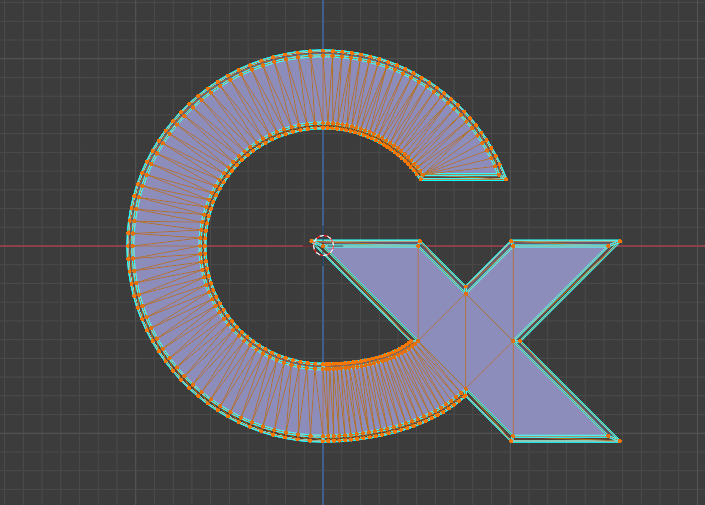
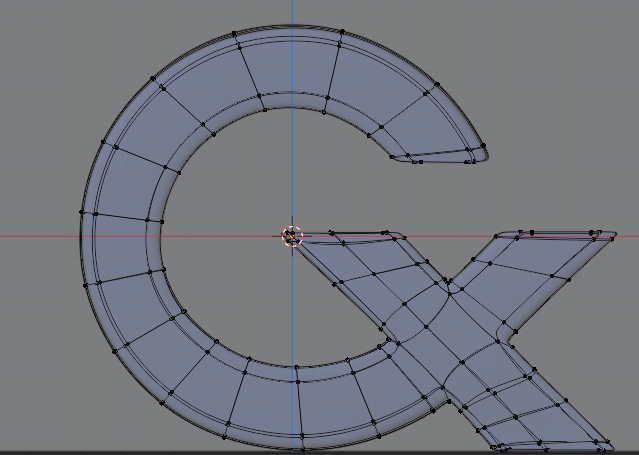
- You should construct your mesh with quads.
A decent topology in a given geometry is one whose mesh is primarily comprised of quads (four-sided objects – squares, rectangles, etc.). This is considered better than tris (triangles) or n-gons (multiple-sided shapes, typically greater than 4 sides).
- Avoid Poles
Another important pitfall you should avoid is poles. These are vertices with more or less than four edges. You can achieve a much better topology without them. Poles usually result in mesh pinching.
- Avoid Sharp Edges
While building your model avoid sharp edges. This is a smart technique.
- Construct Character in Neutral Pose:
Keep in mind that you should construct your model in a neutral pose. Simply said, your basic mesh should not have deformations or distortions.
Other procedures involved in producing 3D models include sculpting, UV unwrapping, texturing, shading, and so on. We will not go into these in this post.
Note: Depending on the intricacy of the design, modeling a 3D logo may not need the procedures of blocking and sculpting.
Conclusion
In this article, we showed you how to practically, set up a basic rig for the animation of logos as well as how to create an optimal mesh.
About the Author
Onyinye Obiorah (M.B.B.S) is an Associate 3D Animator at Cademix Intitute of Technology. She is a 3d Artist, 3d Character Designer and 3d animator.
Email: nesheroomri@yahoo.com, hananiah0777@gmail.com
Phone and Whatsapp number: +2348135512001
Linkedin: https://www.linkedin.com/in/onyinye-obiorah-036971174/
Related Keywords
Computer-animation, Tutorials, Computer-graphics, Visualizations, Motion-capture, Photoshop, Keyframe, Animation studios, Photorealistic, Opengl, Animation Studio.