Techniker im Bauwesen in Österreich

Techniker im Bauwesen in Österreich: 7 Aufgaben, Karriere und Gehalt

Estimated Reading Time: 7 minutes

Einleitung

Techniker im Bauwesen in Österreich ist ein gefragtes Berufsprofil auf dem österreichischen Arbeitsmarkt. Der Bausektor gehört zu den wichtigsten wirtschaftlichen Bereichen des Landes und bietet stabile Beschäftigungsmöglichkeiten. Aufgrund der kontinuierlichen Entwicklung von Infrastrukturprojekten, Wohnbau, Straßenbau und Verkehrsnetzen steigt der Bedarf an qualifizierten Fachkräften kontinuierlich an. Ein Techniker im Bauwesen übernimmt dabei eine zentrale Rolle, weil er zwischen Planung, Organisation und praktischer Umsetzung vermittelt.

Die österreichische Bauwirtschaft verzeichnet seit Jahren ein konstantes Wachstum. Laut aktuellen Statistiken trägt die Branche etwa 7% zum Bruttoinlandsprodukt bei und beschäftigt über 400.000 Menschen. Diese Entwicklung schafft einen dauerhaften Bedarf an Fachkräften, insbesondere im Bereich der technischen Baubegleitung. Wer sich für eine Karriere als Techniker im Bauwesen in Österreich interessiert, findet derzeit sehr gute Zukunftsperspektiven und vielfältige Einsatzmöglichkeiten in einem innovativen und zukunftsorientierten Arbeitsumfeld.Author: Hamed Salimian

Techniker im Bauwesen in Österreich
Techniker im Bauwesen in Österreich auf einer Baustelle bei der Qualitätskontrolle

Berufsbild und Aufgaben eines Technikers im Bauwesen

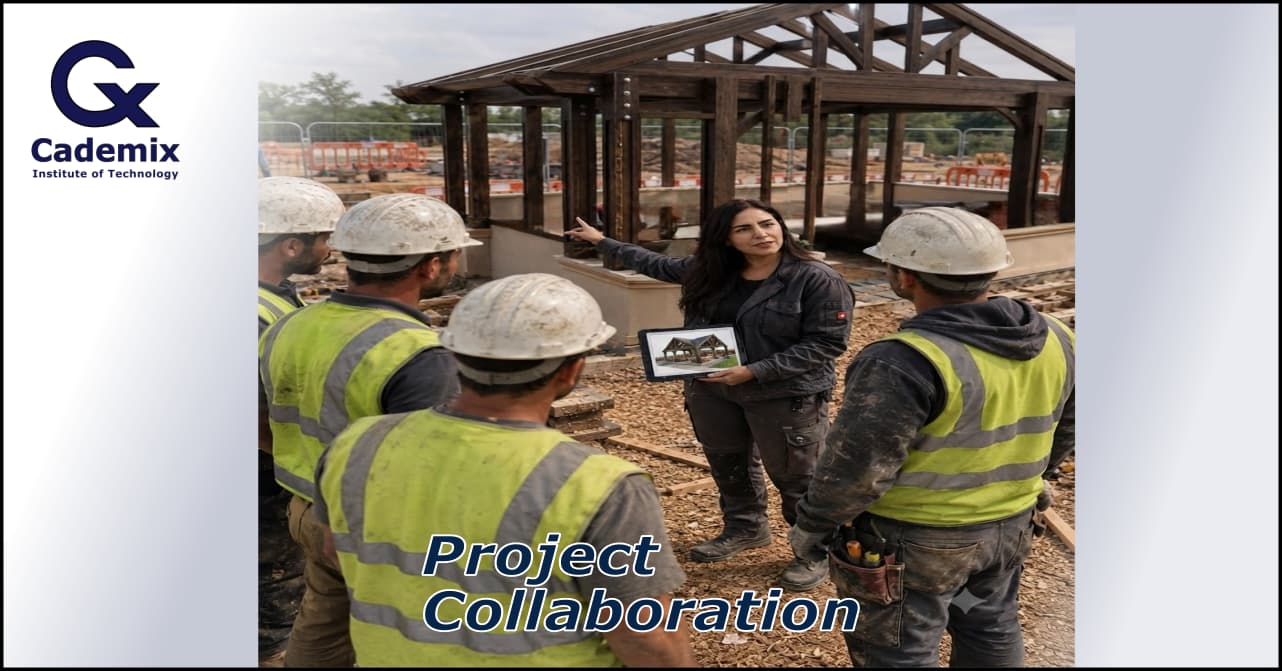
Ein Techniker im Bauwesen in Österreich arbeitet an der entscheidenden Schnittstelle zwischen technischer Planung und praktischer Bauausführung. Während Bauingenieure oft für komplexe Berechnungen, statische Analysen und strategische Projektentwicklung verantwortlich sind, kümmert sich der Techniker um die technische Begleitung, Bauüberwachung und Koordination auf der Baustelle. Diese Position erfordert sowohl fundiertes technisches Wissen als auch ausgeprägte organisatorische Fähigkeiten und exzellente Kommunikationskompetenz.

Die Rolle des Technikers ist besonders wichtig, weil er als Bindeglied zwischen verschiedenen Projektbeteiligten fungiert. Er muss die Sprache der Architekten, Ingenieure, Bauleiter und Handwerker gleichermaßen verstehen und zwischen diesen Gruppen effektiv vermitteln können. Dabei trägt er maßgeblich dazu bei, dass Missverständnisse vermieden werden und alle Beteiligten auf dem gleichen Informationsstand sind.

Detaillierte Aufgabenbereiche

Zu den typischen Aufgaben eines Technikers im Bauwesen in Österreich gehören die Unterstützung bei der Erstellung und Prüfung von Bauplänen, die kontinuierliche Kontrolle von Bauabläufen, die sorgfältige Dokumentation des Baufortschritts sowie die umfassende Überprüfung von Sicherheits- und Qualitätsstandards. Darüber hinaus helfen viele Techniker aktiv bei der präzisen Mengenermittlung und strategischen Materialplanung mit.

Im Detail umfasst dies die Erstellung von Aufmaßen, die Koordination von Lieferanten und Subunternehmern, die Überwachung von Fristen und Budgets sowie die Sicherstellung der Einhaltung aller relevanten Bauvorschriften und Normen. Ein Techniker im Bauwesen in Österreich muss auch in der Lage sein, technische Probleme schnell zu erkennen und pragmatische Lösungen zu entwickeln, bevor kleine Schwierigkeiten zu größeren Projektverzögerungen führen.

  1. Erstellung, Prüfung und Anpassung technischer Unterlagen und Ausführungspläne
  2. Kontinuierliche Baustellenüberwachung und systematische Qualitätskontrolle
  3. Detaillierte Materialermittlung, Mengenberechnung und Kostenkontrolle
  4. Effektive Koordination mit Bauleitern, Ingenieuren, Architekten und ausführenden Firmen
  5. Umfassende Dokumentation, regelmäßige Berichterstattung und Fotodokumentation
  6. Überwachung der Einhaltung von Arbeitssicherheitsvorschriften und Umweltschutzrichtlinien
  7. Technische Abnahmen und Mängelmanagement
  8. Unterstützung bei Vergabeverfahren und Ausschreibungen

Wichtige Einsatzbereiche und Spezialisierungsmöglichkeiten

Ein Techniker im Bauwesen in Österreich kann in verschiedenen Fachbereichen tätig sein, die jeweils spezifische Anforderungen und Kenntnisse erfordern.

Hochbau

Im Hochbau konzentriert sich die Arbeit vor allem auf Wohngebäude, Mehrfamilienhäuser, Bürohäuser, Einkaufszentren und Industrieanlagen. Hier sind Kenntnisse in Bereichen wie Statik, Wärmedämmung, Brandschutz und moderne Bautechniken besonders wichtig. Der Techniker im Bauwesen in Österreich im Hochbau überwacht die Errichtung von Rohbauten, koordiniert verschiedene Gewerke und stellt sicher, dass alle bauphysikalischen Anforderungen erfüllt werden.

Tiefbau

Im Tiefbau stehen Straßen, Autobahnen, Brücken, Tunnel, Kanalisationssysteme und Leitungsnetze im Mittelpunkt. Diese Projekte erfordern spezielle Kenntnisse in Bodenmechanik, Vermessung, Entwässerung und Verkehrsplanung. Besonders in Österreich haben Infrastruktur und Verkehrsbau eine große Bedeutung, da kontinuierlich in die Modernisierung und Erweiterung von Autobahnen, Eisenbahnverbindungen und öffentlichen Verkehrsprojekten investiert wird.

Ingenieurbau

Der Ingenieurbau umfasst besonders anspruchsvolle Bauwerke wie große Brücken, Staudämme, Kraftwerke und komplexe Industrieanlagen. Ein Techniker im Bauwesen in Österreich in diesem Bereich arbeitet oft an langfristigen Großprojekten mit hohen technischen Anforderungen und muss eng mit spezialisierten Ingenieuren zusammenarbeiten.

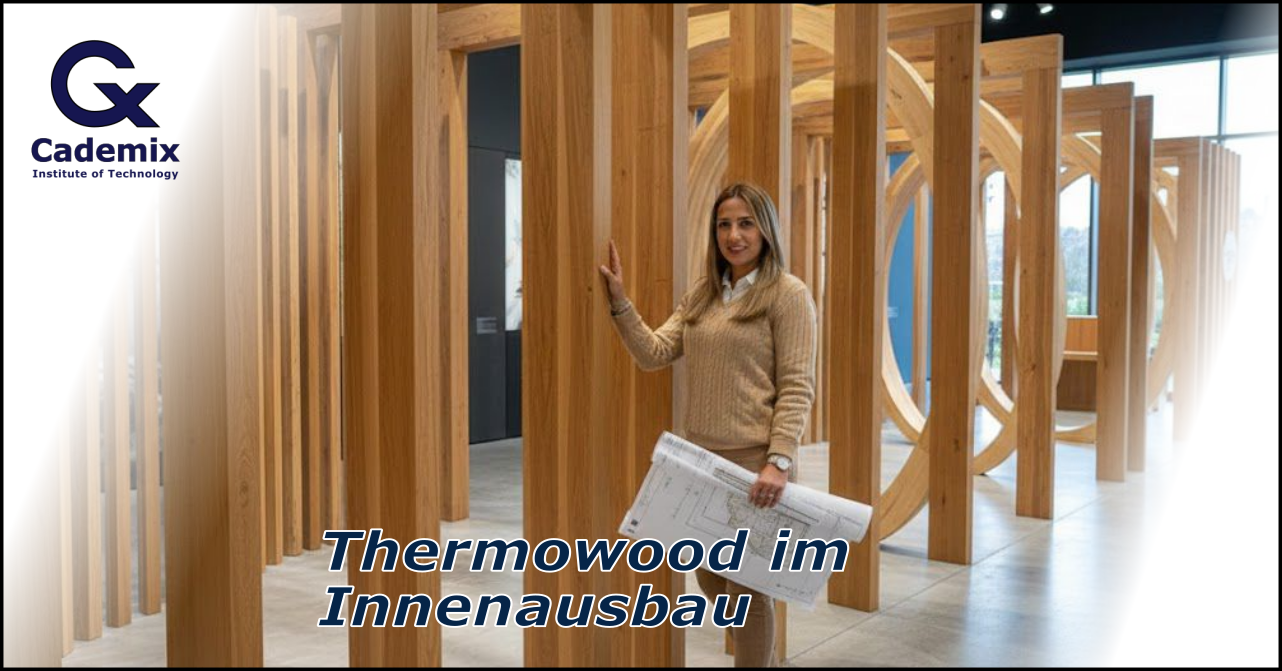
Sanierung und Denkmalpflege

Ein wachsender Bereich ist die Sanierung von Altbauten und die Arbeit mit denkmalgeschützten Gebäuden. Hier sind besondere Kenntnisse über historische Bautechniken, Materialien und spezielle Sanierungsverfahren erforderlich. Österreich verfügt über einen reichen Bestand an historischer Bausubstanz, was diesen Bereich besonders relevant macht.

Ausbildung und Qualifikationen

Für den erfolgreichen Einstieg als Techniker im Bauwesen in Österreich gibt es mehrere bewährte Bildungswege, die unterschiedliche Schwerpunkte setzen und verschiedene Zielgruppen ansprechen.

HTL für Bautechnik

Die Höhere Technische Lehranstalt (HTL) für Bautechnik ist der klassische und am weitesten verbreitete Ausbildungsweg in Österreich. Diese fünfjährige Ausbildung bietet eine praxisnahe und zugleich theoretisch fundierte Ausbildung, die Schüler direkt nach der Matura ins Berufsleben führt. Die HTL vermittelt umfassende Kenntnisse in Baukonstruktion, Statik, Baustoffkunde, CAD-Technik, Projektmanagement und Baurecht.

Absolventen einer HTL sind besonders geschätzt, weil sie bereits während der Schulzeit durch Praktika erste Berufserfahrung sammeln und mit modernen Softwaretools vertraut werden. Nach dem Abschluss können sie direkt als Techniker im Bauwesen in Österreich arbeiten oder ein weiterführendes Studium beginnen.

Fachschule und Kolleg

Für Personen, die bereits eine andere Ausbildung abgeschlossen haben oder einen schnelleren Einstieg suchen, bieten sich Fachschulen oder Kollegs an. Diese Ausbildungsformen dauern zwischen zwei und vier Jahren und konzentrieren sich auf praktische Fähigkeiten und direkt anwendbares Wissen. Ein Kolleg richtet sich speziell an Personen mit Matura, die eine kompakte, intensive Fachausbildung absolvieren möchten.

Hochschulstudium

Ein Studium im Bauingenieurwesen an einer Fachhochschule oder Universität bietet die umfassendste akademische Ausbildung. Studierende erwerben tiefgehende theoretische Kenntnisse in Statik, Massivbau, Stahlbau, Geotechnik und Projektmanagement. Viele Programme beinhalten auch Praktika und Projektarbeiten mit realen Bauvorhaben. Absolventen können als Techniker im Bauwesen in Österreich mit erweiterten Verantwortungsbereichen arbeiten oder direkt in Ingenieurfunktionen einsteigen.

Lehre und duales System

Eine weitere Möglichkeit ist die Lehre zum Bautechnischen Zeichner oder in verwandten Berufen, kombiniert mit weiterführenden Ausbildungen. Dieser Weg eignet sich besonders für praktisch orientierte Personen, die früh ins Berufsleben einsteigen und parallel lernen möchten.

Detaillierte Informationen zu Ausbildungswegen und Lehrberufen finden Sie auf der Website der Wirtschaftskammer Österreich (WKO).

Notwendige Fachkenntnisse und Softwarekompetenzen

Ein moderner Techniker im Bauwesen in Österreich benötigt eine breite Palette an fachlichen und digitalen Kompetenzen, um den Anforderungen des Berufs gerecht zu werden.

CAD und BIM

Die Beherrschung von CAD-Software (Computer-Aided Design) wie AutoCAD, Revit oder ArchiCAD ist unverzichtbar. Zunehmend wichtig wird auch BIM (Building Information Modeling), ein innovativer Ansatz zur digitalen Planung und Verwaltung von Bauwerken. BIM ermöglicht die dreidimensionale Darstellung von Gebäuden mit allen relevanten Informationen und erleichtert die Zusammenarbeit zwischen allen Projektbeteiligten erheblich.

Projektsoftware

Kenntnisse in Projektmanagement-Software wie MS Project, Primavera oder speziellen Baumanagement-Programmen sind sehr hilfreich. Diese Tools unterstützen bei der Terminplanung, Ressourcenverwaltung und Kostenkontrolle.

Vermessung und GIS

Grundkenntnisse in Vermessungstechnik und geografischen Informationssystemen (GIS) werden zunehmend wichtiger, besonders im Tiefbau und bei Infrastrukturprojekten.

Mehr zu digitalen Kompetenzen im Bauwesen finden Sie in unserem Beitrag über Smart Infrastructure und IoT-Monitoring.

Karrierechancen und Gehaltsentwicklung

Der österreichische Arbeitsmarkt zeigt eine konstant hohe und wachsende Nachfrage nach qualifizierten Fachkräften im Bauwesen. Viele Unternehmen – von kleinen regionalen Baufirmen bis zu großen internationalen Baukonzernen – suchen kontinuierlich erfahrene Mitarbeiter für Bauleitung, Projektkoordination und technische Überwachung.

Karrierewege

Ein Techniker im Bauwesen in Österreich kann sich im Laufe der Karriere in verschiedene Richtungen entwickeln:

  • Bauleiter: Übernahme der Gesamtverantwortung für einzelne Bauprojekte
  • Projekttechniker: Spezialisierung auf technische Projektbegleitung
  • Kalkulator: Fokus auf Kostenschätzung und Angebotserstellung
  • Spezialist für Infrastrukturprojekte: Expertise in komplexen Tiefbauprojekten
  • BIM-Manager: Verantwortung für digitale Planungsprozesse
  • Abteilungsleiter: Führung von Teams und Abteilungen
  • Selbständigkeit: Gründung eines eigenen Ingenieurbüros oder Bauunternehmens

Gehaltsstruktur

Das monatliche Bruttogehalt für einen Techniker im Bauwesen in Österreich variiert je nach Erfahrung, Verantwortungsbereich, Unternehmensgröße und Region:

  • Berufseinsteiger: 2.500 bis 3.200 Euro brutto monatlich
  • Mit 3-5 Jahren Erfahrung: 3.200 bis 3.800 Euro
  • Mit 5-10 Jahren Erfahrung: 3.800 bis 4.500 Euro
  • Senior-Techniker/Bauleiter: 4.500 bis 6.000 Euro und mehr

Besonders in größeren Bauunternehmen, bei Generalunternehmern oder bei komplexen Infrastrukturprojekten sind attraktive Gehälter und zusätzliche Benefits wie Firmenfahrzeug, Bonuszahlungen oder flexible Arbeitsmodelle realistisch. Auch die regionale Komponente spielt eine Rolle: In Wien und den westlichen Bundesländern liegen die Gehälter tendenziell höher als in ländlichen Regionen.

Wichtige Kompetenzen und persönliche Eigenschaften

Neben der fachlichen Qualifikation sind bestimmte persönliche Eigenschaften und Soft Skills entscheidend für den Erfolg als Techniker im Bauwesen in Österreich:

  • Technisches Verständnis: Fähigkeit, komplexe technische Zusammenhänge zu erfassen und zu erklären
  • CAD- und Software-Kenntnisse: Sicherer Umgang mit modernen Planungs- und Dokumentationstools
  • Organisationstalent: Koordination mehrerer Aufgaben, Termine und Projektbeteiligter gleichzeitig
  • Team- und Kommunikationsfähigkeit: Effektive Zusammenarbeit mit verschiedenen Gewerken und Hierarchieebenen
  • Präzision und Verantwortungsbewusstsein: Genauigkeit bei Messungen, Berechnungen und Dokumentation
  • Problemlösungskompetenz: Schnelle und pragmatische Lösungsfindung bei unerwarteten Herausforderungen
  • Stressresistenz: Ruhe bewahren bei Zeitdruck und unvorhergesehenen Komplikationen
  • Wirtschaftliches Denken: Kostenb ewusstsein und Verständnis für betriebswirtschaftliche Zusammenhänge
  • Flexibilität: Anpassungsfähigkeit an wechselnde Arbeitsorte, Projekte und Anforderungen

Herausforderungen im Berufsalltag

Der Beruf des Technikers im Bauwesen in Österreich bringt auch spezifische Herausforderungen mit sich, die bewältigt werden müssen:

Zeitdruck und Termine

Bauprojekte unterliegen oft strengen Zeitplänen und Vertragsstrafen bei Verzögerungen. Techniker müssen in der Lage sein, auch unter Druck präzise zu arbeiten und realistische Lösungen zu finden, wenn Termine gefährdet sind.

Wetterbedingungen

Besonders im Tiefbau und bei Außenarbeiten können Witterungsverhältnisse die Arbeit erheblich beeinflussen. Ein Techniker im Bauwesen in Österreich muss flexibel reagieren und alternative Zeitpläne entwickeln können.

Koordination verschiedener Gewerke

Die gleichzeitige Koordination von Maurern, Elektrikern, Installateuren, Statikern und anderen Fachleuten erfordert diplomatisches Geschick und klare Kommunikation. Konflikte müssen schnell und konstruktiv gelöst werden.

Rechtliche und normative Anforderungen

Die Einhaltung von Bauvorschriften, ÖNORMEN, EU-Richtlinien und Sicherheitsstandards erfordert kontinuierliche Weiterbildung und aktuelles Wissen. Änderungen in Gesetzen und Normen müssen zeitnah umgesetzt werden.

Zukunftstrends und Digitalisierung

Die Baubranche befindet sich in einem tiefgreifenden Wandel, der auch die Rolle des Technikers im Bauwesen in Österreich verändert und erweitert:

Building Information Modeling (BIM)

BIM wird zunehmend zum Standard, besonders bei öffentlichen Aufträgen. Die dreidimensionale, datenbasierte Planung ermöglicht bessere Koordination, weniger Fehler und effizientere Abläufe. Techniker, die BIM beherrschen, haben deutliche Wettbewerbsvorteile.

IoT und Smart Construction

Sensoren auf Baustellen erfassen Daten zu Materialfeuchtigkeit, Temperaturen, Belastungen und Arbeitsfortschritt in Echtzeit. Diese Informationen helfen, Probleme frühzeitig zu erkennen und Prozesse zu optimi…

Smart Infrastructure Bridge Monitoring

5 entscheidende Vorteile von Smart Infrastructure und IoT-Sensoren

Estimated Reading Time: 4 minutes

Einführung: Smart Infrastructure und die Zukunft der Bauwerksüberwachung

von Hamed Salimian

Die moderne Bauindustrie steht heute vor großen Herausforderungen. Brücken, Straßen und andere wichtige Bauwerke müssen über viele Jahrzehnte sicher, effizient und nachhaltig betrieben werden. Gleichzeitig steigen die Anforderungen an Sicherheit, Wartung und Kostenkontrolle. Genau hier gewinnt das Konzept der Smart Infrastructure zunehmend an Bedeutung.

Durch den Einsatz moderner Technologien wie IoT‑Sensoren, drahtlosen Messsystemen und datenbasierter Analyse können Ingenieure den Zustand von Bauwerken heute nahezu in Echtzeit überwachen. Diese Technologien ermöglichen es, strukturelle Veränderungen frühzeitig zu erkennen, Wartungsmaßnahmen gezielt zu planen und die Lebensdauer von Infrastruktur deutlich zu verlängern.

In diesem Artikel beschreibt Hamed Salimian, wie intelligente Sensorsysteme und digitale Überwachungstechnologien die Überwachung von Brücken und Straßen verändern. Der Beitrag gibt einen Überblick über die wichtigsten Technologien im Bereich Structural Health Monitoring, Predictive Maintenance und Digital Twin Systeme und zeigt, wie Smart Infrastructure zur Sicherheit, Effizienz und Nachhaltigkeit moderner Infrastruktur beiträgt.

Die Entwicklung moderner Städte hängt stark von zuverlässigen Verkehrsinfrastrukturen ab. Brücken, Straßen und Tunnel bilden das Rückgrat der Mobilität und der wirtschaftlichen Entwicklung. Gleichzeitig stehen viele Länder vor einem wachsenden Problem: alternde Infrastruktur, steigende Verkehrsbelastung und begrenzte Wartungsbudgets. In diesem Kontext gewinnt das Konzept der „Smart Infrastructure“ zunehmend an Bedeutung. Durch den Einsatz von IoT‑Sensoren (Internet of Things) können Bauwerke kontinuierlich überwacht und potenzielle Schäden frühzeitig erkannt werden.

Smart Infrastructure Bridge Monitoring
Sensorbasierte Überwachung einer Brücke in einer Smart Infrastructure

Was bedeutet Smart Infrastructure?

Der Begriff Smart Infrastructure beschreibt die Integration digitaler Technologien in physische Infrastrukturen wie Brücken, Straßen, Tunnel oder Eisenbahnsysteme. Sensoren, Datenplattformen und intelligente Analysesysteme ermöglichen es, den Zustand von Bauwerken in Echtzeit zu überwachen.

Das Internet der Dinge (IoT) als Basis .

Ein zentraler Bestandteil dieser Entwicklung ist das Internet der Dinge. IoT-Sensoren sammeln kontinuierlich Daten über Belastung, Vibration و Temperatur.zentraler Bestandteil dieser Entwicklung ist das Internet der Dinge. IoT‑Sensoren sammeln kontinuierlich Daten über Belastung, Vibration, Temperatur, Feuchtigkeit oder strukturelle Veränderungen. Diese Daten werden anschließend an zentrale Systeme übertragen, wo sie analysiert und ausgewertet werden.

IoT‑Sensoren in der Brückenüberwachung

Brücken gehören zu den sensibelsten Bauwerken der Verkehrsinfrastruktur. Traditionell erfolgt ihre Inspektion in regelmäßigen Abständen durch Ingenieure. Diese Methode ist jedoch zeitaufwendig, teuer und erkennt Schäden häufig erst spät.

IoT‑basierte Monitoring‑Systeme ermöglichen eine kontinuierliche Zustandsüberwachung. Sensoren messen beispielsweise:

• strukturelle Belastung und Deformation

• Schwingungen und dynamische Kräfte

• Temperaturveränderungen im Material

• Rissbildung im Beton oder Stahl

Durch diese Daten können Ingenieure frühzeitig erkennen, ob sich ein strukturelles Problem entwickelt. Moderne Algorithmen analysieren die Messwerte automatisch und warnen bei kritischen Veränderungen.
Weitere Informationen zur Forschung an intelligenten Sensorsystemen finden Sie beim Fraunhofer-Institut für Physikalische Messtechnik IPM.

Straßenüberwachung durch intelligente Sensorik

Auch Straßennetze profitieren zunehmend von intelligenten Sensorsystemen. IoT‑Technologien ermöglichen eine präzise Analyse der Verkehrsdichte, der Straßenzustände und der Belastung durch Fahrzeuge.

Sensoren können beispielsweise:

• Verkehrsströme in Echtzeit messen

• Straßenschäden oder Schlaglöcher erkennen

• Temperatur und Feuchtigkeit im Asphalt überwachen

• Winterdienst und Wartungsmaßnahmen optimieren

Diese Daten helfen Städten und Verkehrsbehörden, Wartungsmaßnahmen effizient zu planen und die Lebensdauer von Straßen deutlich zu verlängern.

Vorteile intelligenter Infrastruktur

Die Integration von IoT‑Technologien in die Bauinfrastruktur bietet zahlreiche Vorteile. Einer der wichtigsten Aspekte ist die Verbesserung der Sicherheit. Frühzeitige Warnsysteme können strukturelle Schäden erkennen, bevor sie zu gefährlichen Situationen führen.

Darüber hinaus ermöglicht Smart Infrastructure eine effizientere Nutzung von Wartungsbudgets. Statt regelmäßiger, aber oft unnötiger Inspektionen können Maßnahmen gezielt dort durchgeführt werden, wo tatsächlich Probleme auftreten.

Weitere Vorteile sind:

• höhere Lebensdauer von Infrastrukturprojekten

• reduzierte Wartungskosten

• verbesserte Verkehrssicherheit

• datengestützte Entscheidungsprozesse im Infrastrukturmanagement
Die Bedeutung von Monitoring-Systemen für die Sicherheit wird auch vom TÜV Rheinland hervorgehoben.

Die Rolle von Datenanalyse und künstlicher Intelligenz

Ein weiterer wichtiger Bestandteil moderner Infrastrukturüberwachung ist die Datenanalyse. Die von IoT‑Sensoren generierten Datenmengen sind enorm und erfordern intelligente Auswertungssysteme.

Künstliche Intelligenz und Machine‑Learning‑Algorithmen können Muster in den Sensordaten erkennen und potenzielle Schäden prognostizieren. Dadurch wird ein Übergang von reaktiver Wartung zu sogenannter „predictive maintenance“ möglich.

Predictive Maintenance bedeutet, dass Wartungsmaßnahmen auf Grundlage von Datenprognosen durchgeführt werden, bevor ein Schaden tatsächlich eintritt.

Herausforderungen bei der Implementierung

Trotz der zahlreichen Vorteile stehen viele Infrastrukturbetreiber noch vor Herausforderungen bei der Einführung von Smart Infrastructure. Zu den wichtigsten Herausforderungen gehören:

• hohe Anfangsinvestitionen für Sensorsysteme

• Integration in bestehende Infrastruktur

• Datensicherheit und Datenschutz

• Standardisierung von Technologien

Dennoch zeigen zahlreiche Pilotprojekte weltweit, dass intelligente Infrastruktursysteme langfristig wirtschaftliche und sicherheitstechnische Vorteile bieten.

Zukunftsperspektiven für intelligente Verkehrsinfrastruktur

Die Digitalisierung der Infrastruktur wird in den kommenden Jahren weiter an Bedeutung gewinnen. Technologien wie Digital Twins, künstliche Intelligenz und fortschrittliche Sensorsysteme werden die Planung, Überwachung und Wartung von Bauwerken grundlegend verändern.

In Zukunft könnten digitale Zwillinge von Brücken oder Straßennetzen entstehen, die den realen Zustand eines Bauwerks in Echtzeit abbilden. Ingenieure könnten dadurch potenzielle Risiken simulieren und Wartungsstrategien optimieren.

Fazit: Die Zukunft der Bauinfrastruktur

Smart Infrastructure und IoT‑Sensoren eröffnen neue Möglichkeiten für das moderne Infrastrukturmanagement. Durch kontinuierliche Überwachung, datenbasierte Analysen und vorausschauende Wartung können Brücken und Straßen sicherer, langlebiger und effizienter betrieben werden.

Angesichts zunehmender Verkehrsbelastung und alternder Infrastruktur stellt die Integration intelligenter Technologien einen entscheidenden Schritt dar, um die Zukunft der Verkehrssysteme nachhaltig zu gestalten.

Häufig gestellte Fragen (FAQ)

1. Was sind die Hauptvorteile von Smart Infrastructure?

Die Hauptvorteile liegen in der verbesserten Sicherheit, der Verlängerung der Lebensdauer von Bauwerken und der Kostenoptimierung bei der Wartung.

2. Wie funktionieren IoT-Sensoren an Brücken?

Die Sensoren erfassen physikalische Parameter wie Schwingungen oder Dehnungen und senden diese Daten drahtlos an eine Zentrale zur Analyse.

Möchten Sie mehr über moderne Bautechnologien erfahren? Besuchen Sie unsere Seite über Weiterbildung für Ingenieure.Student Accommodation in Germany: A Comprehensive Guide for International Students

01

Estimated Reading Time: 7 minutes

Thermowood Innenausbau – Nachhaltige Holzlösungen für moderne Raumgestaltung (2026)

Einleitung

Der Thermowood Innenausbau ist ein zentraler Trend im modernen Innenausbau, der Ästhetik, Funktionalität und Nachhaltigkeit vereint. Für Auftraggeber, Architekt:innen und Bauherren sind langlebige, ökologische und optisch ansprechende Materialien entscheidend. Thermowood erfüllt diese Anforderungen optimal und eröffnet vielseitige Möglichkeiten für hochwertige Innenräume.

In diesem umfassenden Fachartikel erläutere ich die Vorteile, Einsatzbereiche, praktische Erfahrungen sowie Planungs- und Ausführungsstrategien für Thermowood Innenausbau. Ziel ist es, Auftraggebern fundierte Einblicke zu geben und meine Expertise in diesem Bereich sichtbar zu machen.Nazanin Farkhondeh, Cademix Institute of Technology, Austria

Nazanin Farkhondeh

Thermowood Innenausbau

Was ist Thermowood?

Thermowood ist Holz, das durch thermische Behandlung bei Temperaturen von 160 bis 220 °C modifiziert wird. Der Prozess erfolgt ausschließlich mit Hitze und Wasserdampf, ohne chemische Zusätze. Dies stabilisiert die Zellstruktur des Holzes, reduziert die Feuchtigkeitsaufnahme und erhöht die Dauerhaftigkeit erheblich – Eigenschaften, die im Innenausbau von entscheidender Bedeutung sind.

Die thermische Modifikation führt zu einer dunkleren, gleichmäßigen Farbgebung, die Holzarten wie Esche, Kiefer oder Buche besonders attraktiv macht. Im Thermowood Innenausbau wird dieses Material sowohl für sichtbare Elemente als auch für funktionale Bauteile wie Einbaumöbel, Wand- und Deckenverkleidungen verwendet.

Thermowood zeichnet sich zudem durch Resistenz gegen Schimmel, Pilze und Insekten aus. Dies macht es zu einer besonders langlebigen und pflegeleichten Lösung für Innenräume, sowohl im privaten als auch im gewerblichen Bereich.

Die Kombination aus natürlicher Ästhetik und hoher Haltbarkeit macht Thermowood zu einem idealen Material für Projekte, bei denen Design, Funktionalität und Nachhaltigkeit gleichermaßen gefragt sind.


Vorteile von Thermowood im Innenausbau

Formstabilität und Langlebigkeit

Die reduzierte Feuchtigkeitsaufnahme verhindert Verziehen und Schrumpfen. Thermowood behält seine Form über Jahre hinweg, was besonders für maßgefertigte Möbel und Wandverkleidungen wichtig ist. Auftraggeber profitieren dadurch von langlebigen, wartungsarmen Innenausbauten.

Darüber hinaus bietet Thermowood durch seine natürliche Stabilität eine hohe Tragfähigkeit, sodass auch komplexe Konstruktionen problemlos realisiert werden können. Dies ist besonders für großflächige Wand- oder Deckenverkleidungen relevant.

Ästhetik und Materialwirkung

Thermowood überzeugt durch eine edle Farbgebung und ruhige Holzstruktur. Im Innenraum entsteht eine warme, einladende Atmosphäre. Im hochwertigen Thermowood Innenausbau wird das Holz oft bewusst sichtbar eingesetzt, um Designelemente zu betonen und dem Raum Charakter zu verleihen.

Nachhaltigkeit

Da bei der Herstellung keine chemischen Zusätze verwendet werden, ist Thermowood vollständig recyclebar und ökologisch unbedenklich. Für Auftraggeber, die auf nachhaltige Bauweise achten, bietet Thermowood eine langfristig wertbeständige Lösung.

Verbesserung des Raumklimas

Thermisch behandeltes Holz reguliert die Feuchtigkeit im Raum und unterstützt so ein ausgeglichenes Raumklima. Im Thermowood Innenausbau sorgt dies für angenehm temperierte und gesunde Räume, sowohl im Wohn- als auch im Objektbereich.

Vielseitige Einsatzmöglichkeiten

Thermowood kann in nahezu allen Bereichen des Innenausbaus eingesetzt werden: Deckenpaneele, Wandverkleidungen, Einbaumöbel, Treppen, Regale und akustische Elemente. Die Kombination aus Ästhetik, Stabilität und Nachhaltigkeit macht es besonders flexibel.


Thermowood Innenausbau

Thermowood und nachhaltige Architektur

Nachhaltige Innenarchitektur erfordert Materialien, die langlebig und ökologisch vertretbar sind. Thermowood erfüllt diese Kriterien und passt hervorragend zu modernen Architekturstilen. In Kombination mit Glas, Stahl oder Stein entstehen kontrastreiche Designs, die sowohl Eleganz als auch Natürlichkeit vermitteln.

Auftraggeber profitieren von Wertbeständigkeit, Investitionssicherheit und einem sichtbaren Bekenntnis zu nachhaltigem Bauen. Thermowood unterstützt zudem Zertifizierungen nach Standards wie DGNB oder LEED.

Die Möglichkeit, Thermowood in Kombination mit anderen nachhaltigen Materialien einzusetzen, eröffnet Architekt:innen und Designern kreative Freiheit und erlaubt individuelle Raumkonzepte für unterschiedlichste Projekte.


Praxiswissen: Thermowood auf der Baustelle

Die fachgerechte Montage ist entscheidend für den Erfolg eines Projekts. In meiner täglichen Praxis vermittle ich Handwerkern und Monteuren die Besonderheiten des Materials, um die optimale Umsetzung zu gewährleisten.

[Platzhalter Bild 2: Erklärung von Thermowood für Arbeiter auf der Baustelle]

Verarbeitungshinweise

  • Akklimatisierung des Holzes vor Montage
  • Verwendung geeigneter Befestigungssysteme
  • Berücksichtigung von Dehnfugen
  • Schonende Oberflächenbehandlung

Präzision und Know-how sichern ein langlebiges, ästhetisch hochwertiges Ergebnis. Auch die richtige Lagerung während des Transports und die sorgfältige Auswahl der Befestigungsmaterialien sind entscheidend für eine fehlerfreie Montage.


Planung und Ausführung von Thermowood Innenausbau

Eine erfolgreiche Umsetzung beginnt mit detaillierter Planung. Materialstärken, Lichtführung, Übergänge zu anderen Bauteilen und Befestigungen müssen frühzeitig definiert werden. 3D-Modelle und Materialmuster helfen, Auftraggebern die Wirkung des späteren Raumes zu visualisieren.

Die enge Abstimmung zwischen Planern, Handwerkern und Auftraggebern ist entscheidend. Auch logistische Aspekte wie Transport, Lagerung und Montage sollten frühzeitig berücksichtigt werden, um Schäden am Material zu vermeiden.

Durch sorgfältige Projektplanung lassen sich Kosten reduzieren, Zeitpläne einhalten und ein qualitativ hochwertiges Ergebnis erzielen.


Thermowood Innenausbau

Projektbeispiele: Innenausbau mit Thermowood

Projekt 1: Wohnbereich mit maßgefertigten Wandverkleidungen

In einem exklusiven Wohnprojekt wurden Thermowood-Paneele als Wandverkleidung eingesetzt. Ziel war es, ein warmes, einladendes Ambiente zu schaffen und gleichzeitig langlebige Oberflächen zu garantieren. Durch die thermische Behandlung konnte das Holz resistent gegen Feuchtigkeit und Temperaturunterschiede gemacht werden, was besonders in Bereichen wie Küche und Bad von Vorteil ist.

Die Zusammenarbeit mit Architekt:innen und Handwerkerteams ermöglichte eine passgenaue Umsetzung der Designideen. Jeder Wandabschnitt wurde präzise zugeschnitten und montiert, sodass nahtlose Übergänge und ein hochwertiges Erscheinungsbild erreicht wurden.

[Platzhalter Bild 3: Maßgefertigte Wandverkleidung im Wohnbereich]

Projekt 2: Büro- und Konferenzräume

In einem modernen Bürogebäude wurde Thermowood für Deckenpaneele und Akustikelemente eingesetzt. Der Einsatz von Thermowood trug zur Reduzierung von Lärm und zur Verbesserung der Raumakustik bei. Gleichzeitig verlieh es den Räumen eine warme, natürliche Optik, die ein angenehmes Arbeitsumfeld unterstützt.

Die Montage erfolgte in enger Abstimmung mit Licht- und Klimakonzepten, um ein harmonisches Zusammenspiel von Material, Lichtführung und Funktionalität zu gewährleisten.

[Platzhalter Bild 4: Thermowood Deckenpaneele im Büro]

Projekt 3: Gastronomie- und Wellnessbereich

In einem Wellnesshotel wurden Thermowood-Möbel und Wandverkleidungen kombiniert, um eine harmonische und natürliche Umgebung zu schaffen. Thermowood wurde aufgrund seiner Feuchtigkeitsbeständigkeit besonders in Sauna- und Nassbereichen eingesetzt. Die Kombination aus Ästhetik und Funktionalität überzeugte sowohl die Betreiber als auch die Gäste.


Wissensvermittlung und Seminare

Ein zentraler Bestandteil meiner Arbeit ist die Wissensweitergabe. Ich organisiere Seminare und Workshops für Planer, Handwerker und Auftraggeber, um das Verständnis für Thermowood zu vertiefen und die fachgerechte Anwendung sicherzustellen.

Die Schulungen umfassen:

  • Materialkunde und Eigenschaften von Thermowood
  • Verarbeitungstechniken und Montagehinweise
  • Pflege und Wartung von Thermowood-Elementen
  • Integration in nachhaltige Architekturprojekte

Durch diese Seminare profitieren Auftraggeber direkt, da geschulte Teams Projekte effizienter und qualitativ hochwertiger umsetzen. Zudem fördern die Workshops Innovation und den Austausch von Best Practices innerhalb der Branche.


Zukunftsperspektiven für Thermowood Innenausbau

Der Einsatz von Thermowood im Innenausbau wird in Zukunft weiter zunehmen, insbesondere in nachhaltigen Bauprojekten. Neue Oberflächenbehandlungen, digitale Planungsmethoden und innovative Verbindungstechniken erweitern die Einsatzmöglichkeiten und steigern die Effizienz.

Innovative Oberflächen

Farblich variierende Thermowood-Oberflächen eröffnen Designern neue Spielräume. Durch digitale Lasertechniken können individuelle Muster, Logos oder Texturen direkt in die Holzoberfläche eingearbeitet werden.

Digitale Planung und BIM

Die Integration von Thermowood in digitale Planungsprozesse und BIM-Modelle (Building Information Modeling) ermöglicht präzise Kalkulationen und eine frühzeitige Abstimmung aller Gewerke. Dies reduziert Fehler und optimiert die Projektkosten.

Nachhaltigkeit und Zertifizierungen

Mit der zunehmenden Bedeutung nachhaltiger Architektur werden Materialien wie Thermowood, die ökologisch unbedenklich und langlebig sind, immer wichtiger. Thermowood unterstützt Zertifizierungen nach Standards wie DGNB, LEED oder BREEAM und trägt zur ökologischen Bewertung von Gebäuden bei.


Thermowood Innenausbau

Fazit

Der Thermowood Innenausbau vereint Design, Technik und Nachhaltigkeit auf einzigartige Weise. Mit sorgfältiger Planung, fachgerechter Umsetzung und fundiertem Wissen lassen sich Innenräume schaffen, die sowohl ästhetisch als auch funktional überzeugen. Auftraggeber profitieren von langlebigen, wartungsarmen und nachhaltigen Lösungen, die den Wert der Immobilie erhöhen.

Thermowood bietet eine Vielzahl von Vorteilen:

  • Hohe Formstabilität und Langlebigkeit
  • Ästhetische, warme Optik
  • Nachhaltigkeit und Recyclingfähigkeit
  • Verbesserung des Raumklimas
  • Vielseitige Einsatzmöglichkeiten

Durch die Integration von Thermowood in Projekte zeigen Auftraggeber und Architekt:innen ein klares Bekenntnis zu Qualität und Nachhaltigkeit. Die Kombination aus praktischer Erfahrung, Fachwissen und kreativen Lösungen macht Thermowood zu einer zukunftssicheren Wahl für moderne Innenausbauprojekte.

Dieser Artikel ist speziell auf die Bedürfnisse von Auftraggebern zugeschnitten und optimiert für den Fokus-Keyword Thermowood Innenausbau, um Expertise, Praxiserfahrung und professionelle Umsetzung sichtbar zu machen.

  1. Thermowood International – Offizielle Website
    https://www.thermowood.fi
    – Informationen zu Herstellung, Eigenschaften und Anwendungsbereichen von Thermowood.
  2. DGNB – Deutsche Gesellschaft für Nachhaltiges Bauen
    https://www.dgnb.de
    – Zertifizierungen und Standards für nachhaltiges Bauen.
  3. LEED – Leadership in Energy and Environmental Design
    https://www.usgbc.org/leed
    – Internationale Standards für nachhaltige Gebäudezertifizierung.
  4. Bauen mit Holz – Informationsplattform Holzbau Österreich
    https://www.holzbau.at
    – Praxisbeispiele und technische Informationen zu Holzbau und Innenausbau.
  5. Thermowood Design Guidelines (PDF)
    https://www.thermowood.fi/media/thermowood-design-guidelines.pdf
    – Empfehlungen für Einsatz, Design und Pflege von Thermowood im Innenausbau.
  6. Holz für Innenräume – Fachartikel und Tipps
    https://www.holz.de
    – Detaillierte Informationen zu Holzarten, Verarbeitung und Pflege.

016

Renovierung eines Bestandsgebäudes – Erfahrungsbericht aus Planung und Umsetzung in 2025

Estimated Reading Time: 10 minutes

Dieser Artikel dokumentiert die Renovierung eines älteren Bestandsgebäudes aus der Perspektive der Planung, Umsetzung und fachlichen Entscheidungsfindung. Im Mittelpunkt steht Renovierung nicht als isolierte Baumaßnahme, sondern als ganzheitlicher Prozess, der den respektvollen Umgang mit bestehender Bausubstanz, die Verbesserung von Sicherheit und Energieeffizienz sowie die Anpassung an zeitgemäße Nutzungsanforderungen miteinander verbindet. Anhand eines realisierten Projekts wird gezeigt, wie architektonische Identität bewahrt, technische Systeme erneuert und räumliche Qualitäten weiterentwickelt werden können, ohne den historischen Charakter des Gebäudes zu verlieren. Der Beitrag versteht sich als praxisnaher Erfahrungsbericht und verdeutlicht, dass qualitätsvolle Renovierung einen nachhaltigen Beitrag zur langfristigen Nutzung und zum Erhalt urbaner Strukturen leisten kann.
Nazanin Farkhondeh, Cademix Institute of Technology, Austria

Renovierung als Haltung, nicht als Maßnahme

Renovierung ist kein rein technischer Vorgang. In meiner beruflichen Praxis habe ich Renovierung immer als eine Haltung verstanden – als bewusste Entscheidung, mit bestehender Bausubstanz verantwortungsvoll umzugehen, statt sie durch standardisierte Neubauprozesse zu ersetzen. Gerade bei älteren Gebäuden geht es nicht nur um Substanz, sondern um Erinnerung, Identität und städtebauliche Kontinuität.

Dieses Projekt steht exemplarisch für diese Haltung. Es handelt sich um die umfassende Renovierung eines älteren Gebäudes, das zwar funktional und technisch stark überholt war, dessen architektonischer Charakter jedoch nach wie vor eine klare Qualität besaß. Die Aufgabe bestand nicht darin, etwas völlig Neues zu schaffen, sondern das Vorhandene weiterzudenken.

Der folgende Artikel dokumentiert diesen Prozess aus der Perspektive der Planung, der technischen Umsetzung und der inhaltlichen Entscheidungen. Er versteht sich nicht als theoretische Abhandlung, sondern als praxisnaher Erfahrungsbericht aus einem realisierten Renovierungsprojekt.


Das Gebäude und sein Kontext

Das Gebäude befand sich in einem gewachsenen urbanen Umfeld und war Teil eines etablierten Stadtgefüges. Seine Entstehung liegt mehrere Jahrzehnte zurück, was sich sowohl in der Bauweise als auch in der Grundrissstruktur deutlich zeigte. Zum Zeitpunkt der Renovierung entsprach es weder aktuellen technischen Standards noch zeitgemäßen Nutzungsanforderungen.

Gleichzeitig verfügte das Gebäude über Eigenschaften, die im heutigen Bauen selten geworden sind. Die Proportionen waren ausgewogen, die Fassadengliederung ruhig und präzise, und die verwendeten Materialien vermittelten eine handwerkliche Qualität, die über reine Zweckmäßigkeit hinausging.

Gerade diese Merkmale führten früh zu der Entscheidung, auf einen Abriss zu verzichten. Eine Renovierung erschien nicht nur wirtschaftlich sinnvoll, sondern auch architektonisch und städtebaulich verantwortungsvoll. Das Gebäude hatte eine Geschichte – und diese sollte nicht ausgelöscht, sondern weitergeführt werden.


016 1

Zielsetzung der Renovierung

Die Definition klarer Ziele war ein entscheidender Schritt zu Beginn des Projekts. Ohne eine präzise Zielsetzung besteht bei Renovierungen die Gefahr, sich in Einzelmaßnahmen zu verlieren oder widersprüchliche Entscheidungen zu treffen.

Im Zentrum stand der Anspruch, die architektonische Identität des Gebäudes zu bewahren und gleichzeitig seine Nutzbarkeit grundlegend zu verbessern. Die Renovierung sollte nicht museal wirken, sondern ein Gebäude hervorbringen, das heutigen Anforderungen gerecht wird, ohne seine Herkunft zu verleugnen.

Ein weiterer Schwerpunkt lag auf der strukturellen Sicherheit und der technischen Erneuerung. Das Gebäude musste den aktuellen Normen entsprechen, ohne dass diese Anpassungen sichtbar dominierend werden. Renovierung bedeutete hier, technische Notwendigkeit und gestalterische Zurückhaltung in Einklang zu bringen.


Bestandsanalyse als Grundlage jeder Entscheidung

Eine sorgfältige Bestandsanalyse ist bei jeder Renovierung unverzichtbar. In diesem Projekt bildete sie die Grundlage aller weiteren Schritte. Es ging nicht nur darum, Schäden zu identifizieren, sondern das Gebäude als System zu verstehen.

Die Tragstruktur wurde detailliert untersucht, ebenso die vorhandenen Materialien und deren Zustand. Dabei zeigte sich, dass viele Bauteile trotz ihres Alters noch über eine solide Substanz verfügten, während andere Bereiche gezielte Eingriffe erforderten.

Parallel dazu wurden die bestehenden Installationen analysiert. Heizung, Elektrik und Leitungsführung entsprachen nicht mehr den heutigen Anforderungen und mussten vollständig neu gedacht werden. Diese Erkenntnisse flossen direkt in das Planungskonzept ein und verhinderten spätere improvisierte Lösungen.


Entwurf und konzeptioneller Ansatz der Renovierung

Der Entwurfsprozess war geprägt von der Frage, wie viel Veränderung notwendig und wie viel Zurückhaltung sinnvoll ist. Renovierung bedeutet immer auch, Entscheidungen über Eingriffe zu treffen – und bewusst auf andere zu verzichten.

Die äußere Erscheinung des Gebäudes blieb weitgehend erhalten. Veränderungen an der Fassade wurden auf ein Minimum reduziert und beschränkten sich auf technische Optimierungen und notwendige Instandsetzungen. Neue Elemente wurden so gestaltet, dass sie klar als zeitgenössische Ergänzungen erkennbar sind, ohne sich in den Vordergrund zu drängen.

Im Inneren hingegen war mehr Spielraum für Anpassungen vorhanden. Hier konnte die Renovierung genutzt werden, um räumliche Qualitäten neu zu definieren, ohne die Grundstruktur des Gebäudes zu zerstören. Dieser bewusste Unterschied zwischen äußerer Zurückhaltung und innerer Weiterentwicklung prägte den gesamten Entwurfsansatz.


Statische Ertüchtigung und Sicherheit

Ein zentraler Bestandteil der Renovierung war die statische Ertüchtigung des Gebäudes. Altersbedingte Schwächen, frühere Umbauten und veränderte Nutzungsanforderungen machten gezielte Maßnahmen erforderlich.

Diese Eingriffe wurden mit großer Sorgfalt geplant. Ziel war es, die Tragfähigkeit und Sicherheit deutlich zu erhöhen, ohne die architektonische Erscheinung zu verändern. Verstärkungen erfolgten dort, wo sie konstruktiv sinnvoll waren, und blieben nach Möglichkeit unsichtbar.

Die Renovierung zeigt hier exemplarisch, dass Sicherheit und Ästhetik keine Gegensätze sein müssen. Durch präzise Planung lassen sich selbst umfangreiche statische Maßnahmen so integrieren, dass sie das Gesamtbild nicht beeinträchtigen.


Technische Erneuerung als unsichtbare Qualität

Die vollständige Erneuerung der technischen Infrastruktur war einer der aufwendigsten Teile der Renovierung. Alte Systeme wurden entfernt und durch zeitgemäße Lösungen ersetzt, die sowohl effizient als auch langlebig sind.

Besonderes Augenmerk lag auf der Energieeffizienz. Durch verbesserte Dämmung, optimierte Heizsysteme und eine durchdachte Haustechnik konnte der Energieverbrauch deutlich reduziert werden. Diese Maßnahmen sind nach außen kaum sichtbar, tragen jedoch maßgeblich zur langfristigen Qualität des Gebäudes bei.

Gerade bei Renovierungen zeigt sich, dass technische Qualität oft im Verborgenen liegt. Ein gut renoviertes Gebäude erkennt man nicht an auffälligen Installationen, sondern an seiner ruhigen, selbstverständlichen Funktionalität.


Räumliche Neuorganisation und Wohnqualität

Ein weiterer Schwerpunkt der Renovierung lag auf der Verbesserung der inneren Raumstruktur. Die ursprünglichen Grundrisse waren stark fragmentiert und entsprachen nicht mehr den heutigen Anforderungen an Flexibilität und Offenheit.

Durch gezielte Eingriffe konnten Räume geöffnet, Sichtbeziehungen verbessert und natürliche Belichtung verstärkt werden. Gleichzeitig wurde darauf geachtet, die ursprüngliche Logik des Gebäudes nicht zu zerstören. Die Renovierung verstand sich hier als Weiterentwicklung, nicht als radikaler Umbau.

Besonders wertvoll war die Reaktivierung zuvor wenig genutzter Bereiche. Flächen, die früher kaum Aufenthaltsqualität boten, wurden in funktionale und gut belichtete Räume transformiert. Dadurch gewann das Gebäude nicht nur an Fläche, sondern vor allem an Nutzungsqualität.


Materialien und Detailentscheidungen

Die Auswahl der Materialien spielte eine entscheidende Rolle für den Charakter der Renovierung. Neue Materialien sollten den Bestand ergänzen, nicht imitieren. Gleichzeitig mussten sie langlebig und wartungsarm sein.

In vielen Bereichen wurde bewusst mit einfachen, robusten Materialien gearbeitet, deren Qualität sich erst im Gebrauch zeigt. Details wurden reduziert ausgeführt, um den Fokus auf Raumwirkung und Proportionen zu legen.

Diese Zurückhaltung ist typisch für hochwertige Renovierungsprojekte im mitteleuropäischen Raum, insbesondere in Österreich, wo Klarheit und Ehrlichkeit im Umgang mit Materialien als Qualitätsmerkmal gelten.

020

Herausforderungen im Renovierungsprozess

Kein Renovierungsprojekt verläuft ohne Herausforderungen. Auch hier traten im Laufe der Umsetzung unerwartete Situationen auf, die flexible Anpassungen erforderten.

Besonders anspruchsvoll war die Koordination zwischen bestehenden Bauteilen und neuen Eingriffen. Jede Entscheidung musste sorgfältig abgewogen werden, da Fehler im Bestand oft schwerer zu korrigieren sind als im Neubau.

Durch eine klare Projektstruktur, enge Abstimmung aller Beteiligten und realistische Zeitplanung konnten diese Herausforderungen jedoch bewältigt werden, ohne die Qualität des Ergebnisses zu gefährden.

Projektbeispiel: Renovierung eines Bestandsgebäudes in Teheran (Iran)

Ein konkretes Beispiel für die im Artikel beschriebene Herangehensweise an Renovierung ist ein Projekt, das wir in Teheran realisiert haben. Das Gebäude befand sich in einem innerstädtischen Quartier mit überwiegend älterer Bausubstanz und wies deutliche Spuren jahrzehntelanger Nutzung auf. Ziel der Renovierung war es nicht, das Gebäude grundlegend zu verändern, sondern seinen baulichen Zustand präzise zu analysieren, Schwachstellen zu identifizieren und auf dieser Basis eine nachhaltige Erneuerung umzusetzen.

Ein wesentlicher Bestandteil dieses Projekts war die detaillierte Bestandsaufnahme vor Ort. Die vorhandene Bausubstanz wurde systematisch geprüft, unter anderem hinsichtlich Materialzustand, Oberflächen, Feuchtigkeitseintrag und thermischem Verhalten der Außenwände. Diese Untersuchungen bildeten die Grundlage für alle weiteren Entscheidungen und ermöglichten es, Eingriffe gezielt und verhältnismäßig zu planen, anstatt pauschale Maßnahmen anzuwenden.

Im Rahmen der Renovierung lag ein besonderer Fokus auf der Gebäudehülle. Die Außenflächen zeigten altersbedingte Abnutzungen, die sowohl ästhetische als auch funktionale Auswirkungen hatten. Durch eine Kombination aus Instandsetzung, materialgerechter Behandlung und gezielten Verbesserungen konnte die Substanz gesichert und gleichzeitig die Lebensdauer des Gebäudes deutlich verlängert werden. Dabei wurde bewusst darauf geachtet, den Charakter des Bestands zu erhalten und keine gestalterischen Brüche zu erzeugen.

Auch dieses Projekt verdeutlicht, dass Renovierung unabhängig vom geografischen Kontext nach denselben professionellen Prinzipien erfolgen sollte: sorgfältige Analyse, Respekt vor dem Bestand und klare Zieldefinition. Die Erfahrungen aus Teheran zeigen, dass eine strukturierte und verantwortungsvolle Renovierung nicht nur die technische Qualität eines Gebäudes verbessert, sondern auch einen langfristigen Beitrag zur Werterhaltung und Nutzbarkeit leistet.

Nachhaltigkeit und langfristige Perspektive der Renovierung

Ein zunehmend wichtiger Aspekt zeitgenössischer Architektur ist die Frage der Nachhaltigkeit. In diesem Zusammenhang gewinnt die Renovierung bestehender Gebäude eine strategische Bedeutung, die weit über rein wirtschaftliche Überlegungen hinausgeht. Jedes Bestandsgebäude repräsentiert bereits gebundene Energie, Ressourcen und kulturellen Wert. Eine sorgfältig geplante Renovierung ermöglicht es, diese vorhandenen Potenziale weiter zu nutzen, anstatt sie durch Abriss und Neubau zu vernichten.

Im vorliegenden Projekt wurde Nachhaltigkeit nicht als isoliertes technisches Ziel verstanden, sondern als integraler Bestandteil des gesamten Planungsprozesses. Bereits in der frühen Konzeptphase wurde geprüft, welche Bauteile erhalten, repariert oder angepasst werden können. Diese Herangehensweise führte nicht nur zu einer Reduktion von Bauabfällen, sondern auch zu einer bewussteren Auseinandersetzung mit dem Wert des Bestands.

Ein weiterer zentraler Aspekt der nachhaltigen Renovierung ist die Lebenszyklusperspektive. Entscheidungen über Materialien, Konstruktionen und technische Systeme wurden nicht allein auf Basis der Investitionskosten getroffen, sondern im Hinblick auf Wartungsaufwand, Langlebigkeit und Anpassungsfähigkeit. Gerade bei Renovierungen zeigt sich, dass kurzfristige Einsparungen häufig langfristig höhere Kosten verursachen können.

Darüber hinaus spielt die soziale Nachhaltigkeit eine wichtige Rolle. Eine Renovierung verändert nicht nur ein Gebäude, sondern beeinflusst auch seine Nutzer und sein Umfeld. Durch die Verbesserung von Raumqualität, Tageslichtführung und funktionaler Klarheit konnte das Gebäude wieder zu einem attraktiven und identitätsstiftenden Ort werden. Dies stärkt nicht nur die Nutzung, sondern auch die emotionale Bindung der Nutzer an den Ort.

Im internationalen Kontext wird Renovierung zunehmend als Schlüsselstrategie für eine verantwortungsvolle Stadtentwicklung verstanden. Während Neubau häufig mit hohem Ressourcenverbrauch verbunden ist, bietet die Arbeit im Bestand die Möglichkeit, bestehende Strukturen intelligent weiterzuentwickeln. Das hier beschriebene Projekt reiht sich in diese Haltung ein und zeigt exemplarisch, wie architektonische Qualität und ökologische Verantwortung miteinander verbunden werden können.

Nicht zuletzt hat dieses Projekt auch gezeigt, dass Renovierung ein Lernprozess ist – für Planer, Bauherren und alle Beteiligten. Der Umgang mit dem Bestand erfordert ein anderes Denken als der Neubau: weniger Kontrolle, mehr Dialog mit dem Vorgefundenen. Gerade in dieser Auseinandersetzung liegt jedoch ein großes kreatives Potenzial.

Zusammenfassend lässt sich sagen, dass Renovierung in diesem Projekt nicht als Einschränkung, sondern als Chance verstanden wurde. Als Chance, vorhandene Qualitäten sichtbar zu machen, neue Nutzungen zu ermöglichen und einen verantwortungsvollen Beitrag zur gebauten Umwelt zu leisten.

21 3

Fazit: Renovierung als nachhaltige Strategie

Die Renovierung dieses Gebäudes zeigt, dass Bestandserneuerung weit mehr sein kann als eine technische Notwendigkeit. Sie ist eine nachhaltige Strategie zur Stadtentwicklung, zur Ressourcenschonung und zum Erhalt kultureller Identität.

Dieses Projekt verdeutlicht, dass Renovierung dann besonders erfolgreich ist, wenn sie mit Respekt vor dem Bestehenden, klaren Zielen und einem langfristigen Qualitätsanspruch durchgeführt wird. Gerade im österreichischen Kontext, in dem historische Bausubstanz einen hohen Stellenwert besitzt, ist diese Herangehensweise von besonderer Bedeutung.

Renovierung ist in diesem Sinne kein Kompromiss, sondern eine bewusste Entscheidung für Qualität, Verantwortung und Kontinuität.

Ausblick

Die in diesem Artikel beschriebene Renovierung zeigt exemplarisch, welches Potenzial in der bewussten Arbeit mit dem Bestand liegt. In einer Zeit, in der Ressourcenknappheit, Klimaziele und städtebauliche Verdichtung zunehmend an Bedeutung gewinnen, wird Renovierung zu einer zentralen architektonischen Aufgabe. Zukünftige Projekte werden noch stärker darauf angewiesen sein, bestehende Strukturen intelligent weiterzuentwickeln, anstatt sie zu ersetzen. Die hier gewonnenen Erfahrungen bestätigen, dass eine präzise Analyse, eine klare konzeptionelle Haltung und interdisziplinäre Zusammenarbeit die entscheidenden Voraussetzungen für qualitätsvolle und nachhaltige Renovierung sind.

Referenz

1) EU-Gebäuderichtlinie – Energy Performance of Buildings Directive (EPBD)
Aktuelle EU-Richtlinie zur Gesamtenergieeffizienz von Gebäuden mit Renovierungszielen, Mindeststandards und nationalen Renovierungsplänen. Enthält Vorgaben zur Energieeffizienz bei Renovierungen.
https://en.wikipedia.org/wiki/Energy_Performance_of_Buildings_Directive_2024

2) National Building Renovation Plans – EU Kommission
Offizielle Seite der EU-Kommission zu nationalen Sanierungsplänen. Verpflichtet Mitgliedstaaten zur langfristi­gen Strategie für Renovierung und Dekarbonisierung des Gebäudebestands bis 2050.
https://energy.ec.europa.eu/topics/energy-efficiency/energy-performance-buildings/national-building-renovation-plans_en

3) Energieeinsparverordnung (EnEV) / Gebäudeenergiegesetz (GEG) – Germany
Regelwerk zu Mindestenergieanforderungen bei Neubau und Renovierung in Deutschland; EnEV durch GEG ersetzt, gilt für Energieeffizienz im Gebäudebereich.
https://en.wikipedia.org/wiki/Energieeinsparverordnung

4) OIB-Mindeststandards Energieeffizienz & Renovierungspässe – Österreich
Österreichische Informationsseite zu Mindeststandards der Gebäudeenergieeffizienz, Renovierungspässen und strategischen Renovierungsplänen gemäß EU-Gebäuderichtlinie.
https://www.oib.or.at/nicht-kategorisiert/mindeststandards-fuer-die-energieeffizienz-renovierungspaesse-und-nationaler-gebaeuderenovierungsplan-in-der-neuen-eu-gebaeuderichtlinie-folge-1-von-2

5) EU-Richtlinie zur Gesamtenergieeffizienz von Gebäuden – Energieverbraucher.de
Erklärung zur Energieeffizienzrichtlinie und zu Anforderungen bei größeren Renovierungen (Mindestenergieeffizienz bei Bestandserneuerung).
https://www.energieverbraucher.de/de/gebaeuderichtlinie__415/

6) Gebäuderichtlinie (EPBD) – Gebaeudeforum.de
Übersicht zu den zentralen Vorgaben der EU-Gebäuderichtlinie, darunter Renovierungspässe, Effizienzanforderungen sowie technische Normen (z. B. Energieausweis, Gebäudeautomation).
https://www.gebaeudeforum.de/ordnungsrecht/eu-vorgaben/epbd/

7) European Green Deal – EU-Klimaschutzprogramm
Überblick über die EU-Strategie zur Dekarbonisierung, inklusive ambitionierter Ziele für Renovierung und Energieeffizienz des Gebäudebestands.
https://en.wikipedia.org/wiki/European_Green_Deal

8) German National Action Plan on Energy Efficiency (NAPE)
Nationaler Aktionsplan Deutschlands zur Energieeffizienz, der auch energieeffiziente Renovierung im Gebäudesektor adressiert; Basis u. a. EU-Energy-Efficiency-Directive.
https://en.wikipedia.org/wiki/German_National_Action_Plan_on_Energy_Efficiency

9) Passive House / EnerPHit Standard (Weltweit anerkannt)
Standard für hohe Energieeffizienz im Neubau und bei Renovierungen (EnerPHit = Passivhaus-Konzept für Bestandsgebäude), relevant für energieeffiziente Renovierungspraxis.
https://en.wikipedia.org/wiki/Passive_house

10) Wikipedia – Energieeffizienzrichtlinie (EED)
EU-Richtlinie zur Energieeffizienz (EED), Teil des gesetzlichen Rahmens, der Renovierungsanstrengungen im Gebäudesektor unterstützt.
https://en.wikipedia.org/wiki/EU_Energy_Efficiency_Directive_2012


Cover graphic showing the Power BI dashboard and Streamlit companion app over a map of Europe.

Power BI: 2 Best Practical EU Inflation Dashboards (Dashboard + Python)

Estimated Reading Time: 12 minutes

I built this project with Power BI to make Eurostat’s Harmonised Index of Consumer Prices (HICP) easier to explore in a way that is both comparative (across countries/regions) and decomposable (down into category, year, quarter, and month). The core deliverable is a Power BI report backed by a semantic model. The model standardizes time handling, country labeling, and category ordering so the visuals behave predictably under slicing and drill-down.

On top of the report, I added a lightweight Streamlit application as a companion UI. It reuses the same conceptual structure date range, country/region filters, COICOP categories, and metric selection in a web-first layout.

The result is a workflow where the Power BI file is the analytical source of truth for modeling and curated visuals, while the Python app offers an alternate way to browse the same series with a narrower deployment surface. The emphasis is not on novelty, but on engineering discipline in data shaping, metric definitions, and interaction design across two runtimes.


Saber Sojudi Abdee Fard

Introduction

When inflation spikes or cools, the first question is usually not “what is the number,” but “where is it coming from, and how does it compare.” I built this dashboard around that workflow: start from an overview (index and inflation rate trends across selected countries/regions), then move into composition (category contributions and drill paths), and finally allow per-country “profile pages” that summarize the category landscape for a given period.

A second requirement was practical reproducibility. The Power BI report is the main artifact, but I also added a small Streamlit app so the same dataset can be explored outside the Power BI desktop environment. The intent is not to replace the report; it is to provide a simpler, web-native view that preserves the same filter semantics and metric definitions.

Design constraints and non-goals

I kept the scope deliberately tight so the visuals remain interpretable under interactive filtering. The report focuses on a curated set of countries/regions and a small COICOP subset that supports stable labeling and ordering, rather than attempting to be a full Eurostat browser. The time grain is monthly and the primary series is the HICP index (2015=100), with inflation rates treated as derived analytics over that index. I also treat “latest” values as a semantic concept (“latest month with data in the current slice”) instead of a naive maximum calendar date, because empty tail months are common in time-series exploration.

This project is not a forecasting system and it does not attempt causal attribution of inflation movements. It also does not try to reconcile HICP movements against external macro variables or explain policy drivers. The Streamlit app is not intended to reproduce every Power BI visual; it is a companion interface that preserves the same filter semantics and metric definitions in a web-first layout.

Methodology

Data contract and grain

The model is designed around a single canonical grain: monthly observations keyed by (Date, geo, coicop). In Power BI, DimDate represents the monthly calendar and facts relate to it via a month-start Date column; DimGeo uses the Eurostat geo code as the join key with a separate display label (Country); and DimCOICOP uses the Eurostat coicop code as the join key with a separate display label (Category) and an explicit ordering column. Facts are intentionally narrow and metric-specific (index levels, inflation rates, weights), but they share the same slicing keys so a single set of slicers can filter the entire model consistently.

The Streamlit app enforces an equivalent contract at ingestion. It expects a monthly index table that can be normalized into: year, month, geo, geo_name, coicop, coicop_name, and index, plus a derived date representing the month start. Inflation rates are computed from the index series within each (geo, coicop) group using lagged values (previous month for MoM, 12 months prior for YoY), which implies a natural warm-up period: YoY values are undefined for the first 12 months of any series.

Data sourcing and parameterization

On the Power BI side, I structured the model around an explicit start and end month (as text parameters) so the report can generate a consistent monthly date spine and align all series to the same window. This choice simplifies both the UX (one date range slider) and the model logic (all measures can assume a monthly grain without defensive checks for mixed frequencies).

The dataset is handled via Power Query (M) with a “flat table” approach for facts: each table carries the keys needed for slicing (time, geography, COICOP category) and a single numeric value column per metric family (index, rates, weights). At the report layer, measures are responsible for turning these fact values into user-facing metrics and “latest” summaries in a way that respects slicers.

Semantic model design

I modeled the dataset as a star schema to keep filtering deterministic and to avoid ambiguous many-to-many behavior. The design uses a small set of dimensions (Date, Geography, COICOP category) and multiple fact tables specialized by metric type (index levels, month-over-month rate, year-over-year rate, and weights). This separation lets each table stay narrow and avoids overloading a single wide fact table with columns that do not share identical semantics.

tar schema model linking DimDate, DimGeo, and DimCOICOP to HICP fact tables for index, rates (MoM/YoY), and weights.

Figure 1: The semantic model is organized as a star schema with Date/Geo/COICOP dimensions filtering dedicated fact tables for index, rates, and weights.

Metric definitions and “latest” semantics

To keep the report consistent across visuals, I centralized calculations into measures. At the base, index values are aggregated from the index fact. Inflation rates are computed as ratios (current index over lagged index) minus one, expressed as percentages. This makes the definition explicit, auditable, and consistent with the time grain enforced by the date dimension.

For “latest” cards/bars, I avoid assuming that the maximum date in the date table is valid for every slice. Instead, a dedicated “latest date with data” measure determines the most recent month where the base metric is non-blank under the current filter context, and the latest-rate measures are defined as the metric evaluated at that date. This prevents misleading “latest” values when a user filters to a subset where some months are missing.

To keep the date slicer from extending beyond the available series, I also apply a cutoff mechanism: a measure computes the maximum slicer date (end of month before the latest data), and a boolean/flag measure can be used to hide dates beyond that cutoff. This improves the interaction quality because users are not encouraged to select an “empty” tail of months.

Report UX and interaction design

The report is organized around a small set of high-signal experiences:

  1. An overview page combining (a) index trajectories by date and country, (b) an annual inflation rate time series view, and (c) a “latest annual inflation rate” comparison bar chart.
  2. A drillable decomposition view that starts from an annual inflation rate and walks through country, category, year, quarter, and month.
  3. Per-country overview pages that summarize category-level annual inflation, category index levels, and the distribution of annual rates over time (useful for “what was typical vs. exceptional”).
Overview page with COICOP and date filters, index-by-country line chart, annual inflation ribbon chart, and latest inflation bar chart.

Figure 2: Overview layout: date filtering and COICOP selection drive index and inflation charts, with a “latest annual inflation rate” bar for quick comparison.

Decomposition tree drilling annual inflation rate by country, category, year, quarter, and month.

Figure 3: Decomposition path: annual inflation rate is broken down stepwise by country, category, and calendar breakdowns to reach month-level context.

Germany overview page showing annual inflation by category, index by category, and annual inflation rate over time.

Figure 4: Country view: a dedicated overview page summarizes category inflation, category index levels, and the time distribution of annual inflation for one country.

Mobile layout with filters and a bar chart of latest annual inflation rate by country.

Figure 5: Mobile-focused view and Streamlit companion UI: a compact “latest annual inflation rate by country” experience paired with a simplified filter panel. a filter-first sidebar and tabbed exploration views for annual YoY series, index trajectories, and supporting tables.

Companion Streamlit app architecture

The Streamlit app mirrors the report’s mental model: choose a date range, countries/regions, COICOP categories, and then explore one of several views (annual rate, monthly rate, index trajectories, and supporting tabular outputs). I designed it as a small module set: a main entrypoint for page layout and routing, helper utilities for data prep, a filters module to standardize selection logic, and a tabs module to keep view-specific plotting code isolated.

For correctness, the app also includes a simple “guardrails” strategy: it flags implausible month-over-month values (for example, extreme outliers) rather than silently accepting them. This is not a substitute for upstream data quality work, but it is a practical way to prevent a single malformed row from dominating a chart in an exploratory UI.

Streamlit UI with sidebar filters and a multi-country annual inflation time series line chart.

Figure 6: Streamlit companion UI: a filter-first sidebar and tabbed exploration views for annual YoY series, index trajectories, and supporting tables.

Key implementation notes

Key implementation notes

The Power BI deliverables are hicp_eu27.pbip / hicp_eu27.pbix. The semantic model metadata is stored under hicp_eu27.SemanticModel/definition/, and the report metadata is stored under hicp_eu27.Report/.

Core analytics are centralized in measures. The model defines base measures such as Index, Monthly inflation rate, and Annual inflation rate, and it also implements “latest-with-data” semantics through Latest Date (with data) and Annual inflation rate (Latest).

Time filtering is kept honest through explicit cutoff logic. Measures such as Max Slicer Date and Keep Date (≤ cutoff) prevent visuals and slicers from drifting into months that exist in the date table but do not have observations in the selected slice.

Report visuals are defined explicitly in the report metadata. In practice, the report uses a line chart for index trends, a ribbon chart for annual inflation over time, a clustered bar chart for latest annual inflation comparisons, a decomposition tree for drill paths, and tabular visuals for series browsing.

The Streamlit companion app uses app/main.py as the entry point, with app/tabs.py, app/filters.py, and app/helpers.py separating view logic, filtering semantics, and shared UI utilities. Static flag assets are stored under app/flags/.

Interaction model

I designed the interaction model around how people typically reason about inflation: compare, drill, and then contextualize. The overview experience prioritizes side-by-side comparisons across countries/regions over a shared date range, with a small number of visuals that answer distinct questions: the index trajectory (level), the inflation rate trajectory (change), and a “latest” comparison (current snapshot). Slicers are treated as first-class controls date range, country/region, and COICOP category and the model is structured so those slicers propagate deterministically across all visuals.

For decomposition, I use an explicit drill path rather than forcing the reader to infer breakdowns across multiple charts. The decomposition view starts at an annual inflation rate and allows stepwise refinement through country, category, and calendar breakdowns (year → quarter → month), so the reader can move from headline behavior to a specific period and basket component without losing context. The per-country pages then act as “profiles”: once a country is selected, the visuals shift from comparison to composition, summarizing category differences and the distribution of annual rates over time.

In the Streamlit app, the same interaction principles are implemented as a filter-first sidebar plus tabbed views. Tabs separate the mental tasks (YoY trends, MoM trends, index levels, latest comparisons, and an exportable series table), while optional toggles control how series are separated (by country, by category, or both) to keep multi-series charts readable as the selection grows.

Results

The primary success criterion for this project is interaction correctness: slicers and filters must produce coherent results across different visual types without requiring users to understand measure-level details. In practice, the report behaves as intended in three “validation checkpoints.”

First, the overview page supports side-by-side country comparisons over a single monthly date range, while remaining stable under COICOP category selection. The index plot and inflation-rate visuals update together, and the “latest annual inflation rate” bar chart remains meaningful because “latest” is defined by data availability rather than by the maximum calendar month.

Second, the decomposition view provides an explicit reasoning path from a headline annual rate into a specific country/category and then into calendar breakdowns. This reduces the need to mentally join multiple charts: the drill path is encoded in the interaction itself.

Third, the per-country overview pages turn a filtered slice into a “profile” that is easy to read: which categories have higher annual inflation, how category indices compare, and how annual inflation distributes over time. This design is particularly useful when the user wants to compare the shape of inflation dynamics across countries rather than just comparing single-point estimates.

Discussion

A recurring design trade-off in this project is where to place logic: in Power Query, in the semantic model, or in the application layer. I chose to keep the facts relatively “raw but standardized” (keys + numeric values) and then express most analytic intent in measures. That makes the metric definitions inspectable and reduces the risk that a transformation silently diverges from what the visuals imply.

Another trade-off is scope control. The model is deliberately constrained to a set of countries/regions and COICOP categories that support clean ordering and readable comparisons. This improves the story and the UI, but it also means the model is not a general-purpose Eurostat browser. If I were productizing this, I would likely add a “wide mode” that dynamically imports more categories and geographies, alongside a curated “core mode” that preserves the current report design.

Finally, the Streamlit app demonstrates portability, but it also introduces the need to keep metric definitions aligned across two runtimes. I mitigated this by mirroring the report’s concepts (metrics, filters, and guardrails) rather than trying to recreate every Power BI visual. The app is most valuable when it stays narrow: fast slicing, clear trend lines, and a readable series table.

Ten essential lessons

  1. I treated the monthly grain as non-negotiable. Everything keys to (Date, geo, coicop).
  2. A star schema keeps cross-filtering stable when multiple fact tables share dimensions.
  3. “Latest” must be semantic, not MAX(Date). I used “latest-with-data” for KPIs.
  4. I applied an explicit slicer cutoff to avoid empty trailing months.
  5. Stable ordering improves readability. I used explicit order columns for geos and categories.
  6. Scope control is a UX feature. I constrained geos and COICOP groups for interpretability.
  7. Narrow facts preserve provenance. Index, rates, and weights remain distinct.
  8. In Streamlit, I centralized filtering so every tab uses the same selection semantics.
  9. Exploratory dashboards need guardrails. I null extreme MoM/YoY values.
  10. Responsiveness matters. I cache ingestion and use layout strategies for dense selections.

Conclusion

This project is a compact example of how I approach analytics engineering: define a stable monthly grain, build a star schema that filters cleanly, centralize metric semantics in measures, and design visuals around the user’s reasoning path rather than around chart variety. Power BI is the primary artifact, and the Streamlit app is a pragmatic companion that reuses the same filter-and-metric concepts in a web-first UI.

The next step is straightforward: document the model decisions (especially “latest” semantics and cutoff logic) directly inside the repo, and decide whether the Streamlit app should read from an exported model snapshot or from a shared data extraction step to reduce drift risk.

References

  1. S. Sojudi, “Eurostat-HICP: Power BI HICP dashboard and Streamlit companion app,” GitHub repository, 2025. https://github.com/sabers13/Eurostat-HICP.
  2. Microsoft, “Power BI documentation,” Microsoft Learn. https://learn.microsoft.com/power-bi/.
  3. Microsoft, “Data Analysis Expressions (DAX) reference,” Microsoft Learn. https://learn.microsoft.com/dax/.
  4. Microsoft, “Power Query M language reference,” Microsoft Learn. https://learn.microsoft.com/powerquery-m/.
  5. Streamlit, Inc., “Streamlit documentation,” 2025. https://docs.streamlit.io/.
  6. Plotly Technologies Inc., “Plotly Python documentation,” 2025. https://plotly.com/python/.
  7. Eurostat, “Harmonised Index of Consumer Prices (HICP) data and metadata,” 2025. https://ec.europa.eu/eurostat/web/main/data/database.
  8. Eurostat, “Eurostat data web services (API) documentation,” 2025. https://ec.europa.eu/eurostat/web/main/data/web-services.

Architecture banner showing admin and user panels connected to a SQL Server database

Building a Reliable Library Management System with 2 Roles: Python UI(Tkinter) and SQL Server

Estimated Reading Time: 16 minutes

I built a Python/Tkinter desktop application to demonstrate core library-management workflows. The application uses Microsoft SQL Server as its backend and connects via pyodbc through a 64-bit Windows System DSN configured for the SQL ODBC driver stack (ODBC Driver 17). The project is organized around typical CRUD operations for library entities and operational flows such as account management and book circulation. The intended end-to-end flows include database initialization, role-based login (admin and user), user registration, adding books, borrowing and returning books, suspending and releasing users, and renewing subscriptions; these flows are described as intended behavior rather than personally validated execution. During implementation, I addressed practical reliability issues commonly encountered in local SQL Server development, including driver encryption settings (e.g., TrustServerCertificate), safe handling of GO batch separators in SQL scripts, and rerunnable (idempotent) table creation. The design also reflects the realities of schema dependency management, such as foreign key ordering and constraint-driven creation/seeding. The project scope is intentionally limited to a single-machine desktop deployment; it is not a web application and does not include an automated test suite.
Saber Sojudi Abdee Fard

Introduction

I built this Library Management System as a desktop-first, database-backed application to exercise the full path from relational modeling to application integration. The core goal is not a “feature-rich library product,” but a clear demonstration of schema design, referential integrity, and CRUD-style workflows exposed through a Tkinter GUI while persisting state in Microsoft SQL Server.

A deliberate early design choice was to treat local developer setup as part of the system, not an afterthought. The project assumes a Windows 64-bit environment and a SQL Server instance (Express/Developer) reachable via a 64-bit System DSN named SQL ODBC using ODBC Driver 17. For local development, the documentation explicitly calls out the common encryption friction point with Driver 17 and suggests either disabling encryption or enabling encryption while trusting the server certificate, which aligns with the reliability lessons captured in the project snapshot.

At the data layer, the schema is centered around a small set of entities Publisher, Category, Book, Member, Transactions, and User_tbl that together model catalog metadata, membership identity, subscription validity, and circulation events. In the ERD, Book references both Publisher and Category (one-to-many in each direction), and Transactions acts as the operational log linking a Member to a Book with dates for borrowing/returning (including due/return dates). The design also separates member identity (Member) from subscription state (User_tbl) through a one-to-one relationship, which is a simple way to keep “who the user is” distinct from “membership validity.”

This project’s scope is intentionally bounded. It is not a web application, it assumes a single-machine DSN-based setup, and it does not include an automated test suite; the project documentation frames it as an educational implementation rather than a production-hardened system.

Library ERD showing entities and relationships

Figure 1 The schema backbone: books are categorized and published, transactions record borrow/return activity, and membership validity is separated into a dedicated subscription table.

Methodology

Database setup and shared utilities

I treated the database as a first-class subsystem rather than an opaque dependency, because most of the application’s correctness depends on consistent schema state and predictable connectivity. The project standardizes connectivity through a Windows 64-bit System DSN named SQL ODBC, and uses pyodbc to open a cursor against a fixed target database (LibraryDB). The connection string is explicit about the common ODBC Driver 17 development friction: encryption can be disabled (Encrypt=no) for local development, or enabled with TrustServerCertificate=yes depending on the developer’s environment and SQL Server configuration. This decision aligns with the project’s “single-machine DSN setup” scope and keeps runtime behavior deterministic across scripts.

To avoid duplicating boilerplate across many standalone Tkinter scripts, I centralized the lowest-level helpers in utils.py. In practice, that file functions as the project’s shared “platform layer”: it owns DB cursor creation, input validation helpers (email/phone), and the password hashing helper used in account creation and bootstrapping.

The schema can be created in two ways, which gives the project a pragmatic “belt and suspenders” setup story:

  1. Python-driven idempotent schema creation (table_creation.py) checks information_schema and sys.indexes before creating base tables and indexes. If any required table is missing, it creates the full set (publisher, book, category, member, subscription table, and transactions) and then builds secondary indexes to support common lookup paths such as book title, author, and member username. The same script separately applies named foreign key constraints (with cascade behavior) only if they do not already exist, and it bootstraps a default admin account if one does not exist. This “check-then-create” approach makes schema creation re-runnable without failing on already-created objects, which is the project’s main safeguard against re-run failures during iterative development.
  2. SQL file batch execution (run_sql_folder.py) executes the .sql files in numeric order (e.g., 1-...sql, 2-...sql) and explicitly supports GO batch separators by splitting scripts into batches using a regex. This matters because GO is not a T SQL statement; it is a client-side batch delimiter, and without pre-processing it will typically break naïve executors. The runner therefore converts a folder of SQL scripts into reliably executable batches and commits each batch.

A related helper exists in utils.py (insert_data_to_tables) that attempts to seed tables by scanning the current directory for .sql files, splitting on semicolons, and executing statements when the target table is empty (or near-empty). This provides a lightweight seeding mechanism, but it is intentionally less strict than the GO-aware runner; in the article, I will describe it as a convenience seeding helper rather than the primary “authoritative” database migration mechanism.

At the schema level, the database design enforces core invariants in the table definitions and constraints: book.status is constrained to a small enumerated set (“In Stock”, “Out of Stock”, “Borrowed”), member.role is constrained to (“Admin”, “User”), and subscription status is constrained to (“Valid”, “Suspend”). The explicit constraints simplify application logic because invalid states are rejected at the database boundary rather than being “soft rules” in UI code.

Authentication, account lifecycle, and role routing

The application’s entrypoint (login.py) is more than a UI screen it also acts as a bootstrapping coordinator that ensures the database is in a usable state before any authentication decision is made. At startup, initialize_database() calls the schema and index creation routines, provisions a default admin account, attempts to seed data, and then applies foreign key constraints. This sequencing is intentional: it makes first-run setup largely self-contained and reduces “works only after manual SQL setup” failure modes, while still keeping the overall system aligned with a local SQL Server development workflow.

Once initialized, the login flow uses a simple but explicit contract: the user submits a username and password, selects a role from a dropdown (“Admin” or “User”), and the application verifies both credentials and role alignment against the database record. The code fetches the member row by username, hashes the entered password, and compares it to the stored hash. It then enforces a role gate: an admin account cannot enter through the “User” route, and a user account cannot enter through the “Admin” route. This guards the navigation boundary between admin and user panels without relying on hidden UI conventions.

The account creation path is implemented as a separate Tkinter screen (create_account.py) that inserts a new member with role fixed to User. Before insertion, it validates required fields, checks that the password confirmation matches, and uses shared validators for email format and phone number format. It also checks username uniqueness with a query that counts existing rows grouped by username, and it refuses registration if the username is already taken. Successful registration writes the new member record and clears the form fields to avoid accidental duplicate submissions.

Password reset is implemented as a lightweight “forgot password” screen (forgetpassword.py). The flow is intentionally minimal: given a username and a new password (with confirmation), it verifies that the username exists in member, then updates the stored password hash. This keeps credential recovery self-contained inside the same data model as login and avoids separate recovery tables or email workflows, which fits the project’s desktop-scope constraints.

Login screen with role selection and password field

Figure 2 The login boundary: users authenticate with a username/password and explicitly choose Admin vs User, which is checked against the stored role before routing to the relevant panel.

Registration form for creating a new library account

Figure 3 User registration captures member identity fields and applies basic validation before inserting a member record with role set to User.

Role-specific panels and profile management

After authentication, the application routes the user into one of two role-specific control surfaces: an admin panel for operational control and a user panel for day-to-day library usage. I implemented these as distinct Tkinter windows, each acting as a small navigation hub that dispatches into focused, single-purpose screens. This “screen-per-script” structure keeps each workflow isolated and reduces the cognitive load of large, monolithic UI modules.

On the admin side, admin_panel.py provides entry points to the book catalog view, user list view, user suspension view, and the admin’s own profile page, plus a guarded logout action that requires confirmation before returning to the login window. The panel itself does not implement the workflows; it acts as a router that destroys the current window and transfers control to the relevant module. That pattern is consistent across the codebase and is the main way UI state is managed without a central controller.

On the user side, user_panel.py is intentionally narrower: it routes to subscription management, borrowing, returning, and the user profile. It passes a user_id (member_id) across windows as the primary identity token for user-scoped operations. This aligns with the schema design: member_id is the stable key for linking identity to circulation and subscription state, and the UI reuses that same key for most user flows.

Profile views for both roles follow the same implementation model: read from the member table using a parameterized query, then render the result in a ttk.Treeview. Admin profile lookup is username-based, while user profile lookup is member_id-based; both approaches are consistent with how the rest of the UI passes identity around (admins are handled by username at entry, users by id after login). The profile screens also provide an “Edit Profile” action that transitions into a dedicated edit form.

The edit forms (admin_edit_profile.py and user_edit_profile.py) are implemented as partial-update screens: they collect only the fields the user actually filled in and then execute one UPDATE statement per field. This is a pragmatic way to avoid overwriting existing values with empty strings and it makes the update logic easy to reason about. The user edit screen additionally routes email and phone through explicit validators before updating the database. Password changes are stored as a hash in the same field used by login, keeping credential semantics consistent across registration, editing, and recovery.

Admin panel with navigation to book list, profile, and user controls

Figure 4 The admin control surface routes into operational workflows (catalog management, user list, and suspension) without embedding the business logic in the panel itself.

Catalog management and circulation workflows

The core “library” behavior in this project is implemented as a set of focused screens that sit directly on top of a small number of database tables: book and publisher for the catalog, category for book categorization, and transactions for circulation history. Rather than hiding SQL behind a separate repository layer, these modules keep the database interaction close to the UI event handlers, with parameterized queries and explicit commits. That choice makes the data flow easy to trace in a learning-oriented codebase: button click → query/update → refreshed view.

On the admin side, booklist.py provides the catalog “truth view” using a join across book, publisher, and category. The query pulls the book’s identity, price, publisher, author, status, and category name(s), and then populates a ttk.Treeview. Because the category table can contain multiple rows per book_id, the code includes a post-processing step that merges categories for the same book into a single display value so the list behaves like a denormalized catalog view without losing the underlying row-level representation. Search is implemented as a set of narrow SQL variants (name, author, publisher, status, category) driven by a radio-button selector, and removal explicitly deletes dependent category rows before deleting the book row to avoid foreign key conflicts.

Adding a book (addbook.py) is implemented as a two-step write that mirrors the schema. The admin enters book metadata plus a publisher name and a category name. The screen first resolves publisher_id by publisher name, inserts a new row into book with an initial status of "In Stock" and a publish date, and then inserts a category row pointing back to the created book_id. In this design, “category” behaves like a book-to-category association table (even though it is named category), which is consistent with how the list view joins categories back onto books.

On the user side, circulation is tracked as an append-only event stream in transactions with a mirrored “current availability” indicator stored in book.status. Borrowing (borrowBook.py) checks the selected row’s inventory status and only proceeds when the book is "In Stock". A successful borrow inserts a "Borrow" transaction for the current member_id and updates the corresponding book.status to "Borrowed". Returning (bookReturn.py) reconstructs the user’s currently borrowed set by counting "Borrow" versus "Return" events per book_id; it displays only those books with exactly one more borrow than return, and a return action records a "Return" transaction and restores the book’s status to "In Stock". The return screen also computes a simple cost estimate as a function of days since the borrow transaction date, which demonstrates how transactional history can drive derived UI metrics.

A few small contracts hold this together cleanly:

  • Availability gating: the UI treats book.status as the immediate guard for whether a book can be borrowed, using "In Stock" as the only borrowable state.
  • Event log + snapshot state: transactions provides a history (“Borrow”/“Return”), while book.status provides the current snapshot for fast display and filtering.
  • User scoping: user-facing operations consistently act on member_id (passed into the screens as user_id) for all transaction writes and reads.
Book list view with search filters and inventory status table

Figure 5 The catalog view surfaces the join of book metadata, publisher, category, and availability status, and it is the main UI surface that reflects the current database state.

Subscription validity and administrative user controls

Beyond catalog and circulation, the project includes a small set of “operations” screens that make membership state explicit and controllable. I kept this logic close to the database tables that represent it: user_tbl stores subscription validity and an expiration date, while member stores identity and role. The UI surfaces these as two complementary control planes: users can extend their own validity period, and admins can inspect, remove, or suspend accounts.

The user-facing subscription screen (subscription.py) treats expire_date as the canonical definition of remaining time. It fetches the user’s current expiration date from user_tbl, computes remaining days relative to date.today(), and displays that countdown prominently. Renewal is implemented as an additive operation: pressing a 3-month, 6-month, or 1-year button adds a relativedelta(months=...) offset to the existing expiration date and writes it back with an UPDATE on the current member_id. This design is intentionally simple: it preserves history in the sense that renewals are always cumulative, and it avoids hard resets that could unintentionally shorten a membership.

On the admin side, userList.py provides an inspection and maintenance view over library accounts by joining member with user_tbl and listing both identity fields and the current status value. From there, the admin can (a) load the full list of valid/suspended users, (b) suspend a selected user by setting user_tbl.status to 'Suspend', and (c) remove a selected user entirely. Removal is implemented as an explicit dependency-ordered delete: the code deletes the user’s transactions first, then the associated user_tbl record, and finally the member record, and then refreshes the listing. Even in a small project, this ordering matters because it aligns with foreign-key dependencies and prevents the most common “cannot delete because it is referenced” failure mode.

Suspended-user management is separated into its own screen (suspendedUsers.py) rather than being an overloaded state inside the main user list. That module filters the join to only users with status 'Suspend', displays them in a table, and provides a “Release User” operation that restores user_tbl.status back to 'Valid'. This split keeps the administrative workflow clearer: “review all users” versus “review only suspended users,” each with its own narrow actions.

Key implementation notes

  • Documentation and system intent: README.md (environment assumptions, DSN requirements, intended workflows, and setup scripts).
  • Schema and relationships: erd/erd diagram.pdf and the Mermaid-based ERD definition embedded in erd/erd lib.html.
  • ERD tooling used in the repo: the single-file “ERD Maker” HTML described in erd/README.md.
  • DB connection and shared helpers: utils.py (ODBC Driver 17 connection string, cursor factory, MD5 hashing, input validation, lightweight seed helper).
  • Idempotent schema + indexes + constraints + admin bootstrap: table_creation.py (existence checks via information_schema and sys.indexes; named FK constraints; default admin provisioning).
  • Deterministic SQL script execution with GO support: run_sql_folder.py (numeric ordering, batch splitting, per-batch commits).
  • Bootstrapping + login routing: login.py (initialize_database(), login(), role dropdown gate, panel dispatch).
  • Registration workflow: create_account.py (submit(), uniqueness check, validators, role assignment to User).
  • Credential reset workflow: forgetpassword.py (submit(), username lookup, password update).
  • Admin navigation hub: admin_panel.py (dispatch to book list, profile, user list, suspension; confirm-before-logout).
  • User navigation hub: user_panel.py (dispatch to subscription, borrow, return, profile; identity passed as member_id).
  • Profile read paths: admin_profile.py (username → member), user_profile.py (member_id → member), both rendered in ttk.Treeview.
  • Profile partial updates: admin_edit_profile.py, user_edit_profile.py (update only non-empty fields; user flow validates email/phone).
  • Admin catalog view, search, and deletion semantics: booklist.py (join-based listing, category aggregation for display, search modes, dependent-delete ordering).
  • Admin book creation path: addbook.py (publisher lookup, insert into book, then associate category).
  • User borrow flow: borrowBook.py (status gate, insert "Borrow" transaction, update book.status).
  • User return flow + “currently borrowed” reconstruction: bookReturn.py (borrow/return counting, insert "Return" transaction, restore status).
  • User renewal flow: subscription.py (remaining-days computation from expire_date, additive renewal using relativedelta, update-by-member_id).
  • Admin user inventory + suspension + deletion ordering: userList.py (join-based listing, status updates, dependency-ordered deletes).
  • Suspended-only view + release operation: suspendedUsers.py (filtered listing by status, restore to 'Valid').
  • Bootstrapped, re-runnable initialization: login.py, table_creation.py, run_sql_folder.py, utils.py.
  • Catalog and joins + display shaping: booklist.py, addbook.py.
  • Circulation eventing and snapshot updates: borrowBook.py, bookReturn.py.
  • Subscription and admin governance controls: subscription.py, userList.py, suspendedUsers.py.

Results

Operational checkpoints derived from the implementation

Because I did not personally execute the full end-to-end flows, I treat “results” here as the observable outcomes the implementation is designed to produce, based on the documented intent and the concrete code paths.

On first run, the application’s entry flow is designed to converge the environment into a usable state by creating the schema, adding indexes and foreign keys, and provisioning a default admin user if one does not already exist. That work is intentionally re-runnable: table creation and constraint application are guarded by existence checks to avoid failing on subsequent runs.

From there, the UI is structured so each workflow has a clear “database side effect” that can be verified by inspecting either (a) the UI tables (Treeviews) or (b) the underlying SQL Server tables:

  • Registration inserts a new member row with role set to User, after username uniqueness and basic validation checks.
  • Login validates credentials and role alignment, then routes to the correct panel.
  • Adding a book inserts into book and associates at least one category entry, after resolving the publisher relationship.
  • Borrowing records a "Borrow" event in transactions and updates book.status to "Borrowed" (only when status is "In Stock").
  • Returning records a "Return" event and restores book.status to "In Stock", while deriving the “currently borrowed” set from borrow/return event counts.
  • Subscription renewal updates user_tbl.expire_date by adding a fixed offset (3/6/12 months) to the current value.
  • Suspension and release toggle user_tbl.status between 'Suspend' and 'Valid', and administrative deletion performs dependency-ordered deletes to avoid foreign-key conflicts.

Catalog and circulation state coherence

A key operational result of the design is that the system maintains two complementary views of circulation:

  1. a durable event log (transactions) that records borrow/return history per member and book, and
  2. a current snapshot (book.status) that makes availability immediately filterable and enforceable at the UI boundary.

The borrow and return screens treat this split consistently: borrowing is gated by the snapshot state, while returning reconstructs “still borrowed” books from the event stream and then writes both a new event and an updated snapshot.

In the UI, the book list view is the most direct “state surface” for these outcomes because it combines book metadata with availability status and category associations in one table.

Membership visibility and administrative control outcomes

Membership validity is designed to be both user-visible and admin-enforceable:

  • For users, remaining validity is computed from expire_date relative to the current date, and renewals are cumulative (additive) rather than resetting the expiry.
  • For admins, account operability is controlled by explicit status transitions (Valid ↔︎ Suspend) and is visible in list views scoped to all users or suspended users only.

What “success” means for this project

For this build, I consider the system successful when the following properties hold in a repeatable local setup:

  • The schema can be created (and re-created) without manual intervention and without failing on re-run.
  • Role routing is explicit and enforced at login, so admin and user control surfaces remain separated by design.
  • Circulation produces consistent outcomes across transactions and book.status, so history and current availability agree.
  • Admin actions (suspend/release/delete) perform predictable state transitions without violating referential integrity.

References

[1] S. Sojudi Abdee Fard, “Library Management System,” GitHub repository, n.d.(GitHub)

[2] Python Software Foundation, “tkinter – Python interface to Tcl/Tk,” Python 3 Documentation, n.d. (Python documentation)

[3] Python Software Foundation, “Graphical user interfaces with Tk,” Python 3 Documentation, n.d. (Python documentation)

[4] M. Kleehammer et al., “pyodbc: Python ODBC bridge,” GitHub repository, n.d. (GitHub)

[5] pyodbc contributors, “pyodbc documentation,” n.d. (mkleehammer.github.io)

[6] Microsoft, “Connection encryption troubleshooting in the ODBC driver,” Microsoft Learn, Sep. 18, 2024. (Microsoft Learn)

[7] Microsoft, “Special cases for encrypting connections to SQL Server,” Microsoft Learn, Aug. 27, 2025. (Microsoft Learn)

[8] Microsoft, “DSN and Connection String Keywords and Attributes,” Microsoft Learn, n.d. (Microsoft Learn)

[9] Microsoft, “Download ODBC Driver for SQL Server,” Microsoft Learn. (Microsoft Learn)

[10] Microsoft, “SQL Server Downloads,” Microsoft, n.d. [Online]. (Microsoft)

[11] Microsoft, “Microsoft SQL Server 2022 Express,” Microsoft Download Center, Jul. 15, 2024. (Microsoft)

[12] dateutil contributors, “relativedelta,” dateutil documentation, n.d. [Online]. (dateutil.readthedocs.io)

[13] python-dateutil contributors, “python-dateutil,” PyPI, n.d. [Online]. (PyPI)

[14] Mermaid contributors, “Entity Relationship Diagrams,” Mermaid Documentation, n.d. (mermaid.ai)

[15] GitHub, Inc., “Creating Mermaid diagrams,” GitHub Docs, n.d. [Online]. (docs.github.com)

Blueprint-style overview of the 7-bit processor co-design workflow linking VHDL hardware, ASM/Python software, and the CPU datapath

A Practical 7-Bit Processor with a Python Assembler

Estimated Reading Time: 16 minutes

I built a compact 7-bit processor to explore hardware–software co-design end-to-end: defining a minimal instruction set, implementing the datapath and control in VHDL, and closing the loop with a small assembler that produces ROM-ready binaries. The design focuses on a small core of operations LOAD, ADD, SUB, and JNZ with an extended MULTIPLY instruction implemented using a shift-and-add approach to keep the hardware simple. Internally, the processor is decomposed into familiar blocks (ALU, register file, program counter, instruction register, ROM, and multiplexers), with a control unit described as an ASM-style state machine that sequences fetch, decode, and execute. A four-register file (R0R3) and a zero flag provide the minimum state and condition mechanism needed for basic control flow. To integrate software with the hardware model, I use a Python-based assembler that converts assembly-like inputs into the binary encodings expected by ROM initialization. The project is intended to be validated in simulation by observing program counter progression, register updates, and ALU outputs under representative instruction sequences.
Saber Sojudi Abdee Fard

Introduction

I designed this project to practice hardware–software co-design in a setting small enough to reason about completely. The core idea is straightforward: define a minimal instruction set, implement a complete processor around that ISA in VHDL, and connect it to a simple software tool a Python assembler that produces the exact 7-bit encodings the hardware expects. The result is an offline simulation workflow where I can iterate on both sides of the boundary: instruction semantics in hardware and program encoding in software.

The processor is intentionally constrained. Both data and instruction representations are 7 bits wide, and the ISA is limited to a small set of operations: LOAD, ADD, SUB, JNZ, and an extended MULTIPLY. Memory is ROM-based, and the goal is correctness and clarity in simulation rather than breadth of CPU features or performance. Within that scope, the design targets a complete “compile -> encode -> load -> simulate -> inspect” loop: compiling and simulating the VHDL modules, translating an assembly-like program through Conversion.py, loading the produced binary into Memory.vhd, and then validating behavior by inspecting the program counter, register updates, and ALU outputs in the simulator.

This article explains the system the way I worked with it: as a set of contracts between modules and between software and hardware. I focus on the architectural decomposition (datapath and control), the encoding boundary enforced by the assembler, and what constitutes a successful run in simulation. I also call out the explicit non-goals such as advanced control-flow features, richer memory models, or microarchitectural optimizations because the constraints are part of what makes the design teachable.

Methodology

Architecture overview

I implemented the processor as a small set of composable VHDL building blocks connected around a single 7-bit internal bus. The top-level entity (Processor) exposes CLK and RESET inputs and exports the four general-purpose register values (R0outR3out) specifically to make simulation inspection straightforward.

Inside Processor.vhd, the datapath is wired as follows:

  • A ROM (Memory) outputs a 7-bit word (MData) addressed by the program counter output (PC_OUT).
  • Two 4-to-1 multiplexers (MUX4x1) select ALU operands from the four register outputs (ROUT0ROUT3). Each mux is driven by a 2-bit selector (S0 for operand A, S1 for operand B).
  • The ALU computes a 7-bit result (ALURes) based on a 2-bit command (CMD).
  • A 2-to-1 “bus mux” (MUX2x1) selects what drives the shared internal bus (BUSout): either ROM data (MData) or the ALU result (ALURes), controlled by BUS_Sel.
  • The shared bus is then assigned to a single internal input (RIN <= BUSout) that feeds every state-holding element: the four registers, the instruction register (IR), and the program counter (PC) load their next value from RIN when their respective load control is asserted.

This wiring creates a clean contract boundary: computation happens in the ALU, storage happens in registers/IR/PC, and the only way values move is by selecting a source onto the bus and latching it into a destination on the next clock edge.

A control unit (control_unit) sits beside the datapath. It consumes the current instruction (ROUTIR, the instruction register output) and per-register zero indicators (ZR0ZR3), and it drives all load/select signals: LD0LD3, LDIR, LDPC, INC, BUS_Sel, plus the ALU command (CMD) and the two operand selectors (Sel0, Sel1).

Block diagram of the 7-bit CPU showing ROM, PC, shared RIN/BUS, register file, operand muxes, ALU, and control-unit signals

Figure 1 — The ROM, register file, and ALU are connected through a single bus-source mux that drives a shared internal bus (RIN), while the control unit sequences selects and load-enables for fetch and execute.

Control unit and instruction sequencing

I implemented the controller as an explicit enumerated-state machine in control_unit.vhd. The control unit decodes two fields from the 7-bit instruction:

  • y <= ROUTIR(6 downto 4) as a 3-bit opcode.
  • x <= ROUTIR(3 downto 2) as a 2-bit register selector (converted to an integer Reg_num for indexing the zero-flag vector).

The control flow uses these states (as defined in the state type): S0, S1, D, S2, S3, S4, S5, S6, S7, and S8. Operationally, they map to a compact fetch–decode–execute loop:

  • Fetch (S0): the controller asserts LDIR <= 1 while selecting ROM data onto the bus (BUS_Sel <= 0). In the same state it asserts INC <= 1 to advance the PC. Conceptually, this state is responsible for “IR <- M[PC]” and “PC <- PC + 1”.
  • Stabilize (S1): the controller deasserts INC and LDIR and transitions to decode.
  • Decode (D): the controller either halts, dispatches to an execute state based on y, or evaluates a conditional branch using the selected register’s zero flag.
    • A literal all-ones instruction (ROUTIR = "1111111") is treated as halt and transitions into S2, which self-loops.
    • If y = "000", it dispatches to Load (S3).
    • If y = "001", it dispatches to Add (S4).
    • If y = "010", it dispatches to Sub (S5).
    • If y = "100", it dispatches to Multiply (S8).
    • Otherwise, it treats the instruction as a conditional PC control operation that consults ZR(Reg_num) and chooses between S6 (load the PC) and S7 (skip).

The execute states drive the datapath in a very direct way:

  • Load (S3) asserts exactly one of LD0LD3 based on x, keeps the bus sourcing from ROM (BUS_Sel <= 0), and asserts INC <= 1 before returning to fetch. This matches a “load immediate/data word from ROM and step past it” pattern.
  • Add/Sub/Multiply (S4, S5, S8) select registers into the two ALU operand muxes (Sel0, Sel1), set CMD to the operation code ("00" for add, "01" for sub, "10" for multiply), switch the bus to the ALU result (BUS_Sel <= 1), and assert one of LD0LD3 to latch the result back into a register. In the current implementation, both operand selectors are derived from the same instruction field (x and ROUTIR(3 downto 2)), so both Sel0 and Sel1 are driven from the same two-bit slice.
  • PC load (S6) asserts LDPC <= 1 while selecting ROM data onto the bus (BUS_Sel <= 0) and returns to fetch. In combination with the top-level wiring (ROM addressed by PC_OUT, bus sourcing from MData), this implements an indirect jump target read: the PC loads the 7-bit word currently stored at the ROM address.
  • PC skip (S7) asserts INC <= 1 and returns to fetch. This acts as the complementary behavior to S6: when the condition is not met, the controller advances past the jump operand word.

That last pair (S6/S7) is a key contract in the design: conditional control flow is implemented by placing a jump target word in ROM immediately after the branch instruction, then either loading the PC from that word (taken) or incrementing past it (not taken). This keeps the instruction format small while still enabling label-based control flow at the assembly level.

Datapath components and local contracts

I structured the datapath around a small number of synchronous state-holding elements (registers, program counter, instruction register) and purely combinational plumbing (multiplexers and the ALU). The shared internal bus (RIN) is the only write-back path: every storage element loads from the same 7-bit value when its load-enable is asserted. That design choice keeps the movement of data explicit each cycle is “pick a source onto the bus, then latch it into one destination” which makes it straightforward to debug in simulation.

Register file and zero flags (Reg.vhd)

Each general-purpose register is implemented as a simple rising-edge latch with a load enable. The register stores a 7-bit vector (res) and continuously computes a per-register zero flag ZR. In this implementation, ZR is asserted high when the register content is exactly 0000000, and deasserted otherwise. Because the zero flag is derived from the stored register value (not the ALU result), conditional control flow is defined in terms of “what is currently in the selected register,” which is a clean contract for a small ISA.

A practical implication of this choice is that the condition mechanism is transparent to inspection: in simulation, I can interpret the branch condition by looking at the register value and its corresponding ZR* signal without needing an additional flag register.

Program counter semantics (PC.vhd)

The program counter is another 7-bit state element with three control inputs: CLR (asynchronous clear), LD (load from the bus), and INC (increment). The implementation uses a single internal accumulator (“inBUS” inside the clocked process) that can be loaded and incremented in the same cycle. If both LD and INC are asserted on a rising clock edge, the update order is “load, then increment,” which gives a well-defined behavior for any state machine that wants “PC <- operand + 1” rather than forcing two cycles.

In the top-level wiring, CLR is driven from the processor’s reset line (mapped through the RST signal), and the fetch phase relies on INC to advance sequentially through ROM addresses.

Instruction register (IR.vhd)

The instruction register is a minimal latch: on a rising clock edge, if LD is high, it captures the current bus value into an internal signal and exposes it as ROUT. There is no decode logic here by design; the controller consumes the raw 7-bit instruction word. This separation keeps “instruction storage” distinct from “instruction interpretation,” which is useful when iterating on encodings during co-design.

Combinational multiplexers (MUX2x1.vhd, MUX4x1.vhd)

I used two mux types:

  • A 2-to-1 mux selects the shared-bus source. In the current design, S=0 selects ROM data and S=1 selects the ALU result. This switch is effectively the “read vs compute” gate for the entire machine.
  • A 4-to-1 mux selects ALU operands from the four register outputs. The selector is two bits wide, built by concatenating the select lines inside the mux and mapping "00", "01", "10", "11" to R0, R1, R2, R3.

Both muxes are purely combinational. That means the timing contract is simple: control signals must be stable in time for the selected value to propagate to the bus (or ALU inputs) before the next rising edge, where it can be latched by the destination element.

ALU behavior and truncation (ALU.vhd)

The ALU accepts two 7-bit operands and a 2-bit CMD:

  • "00" performs unsigned addition.
  • "01" performs unsigned subtraction.
  • "10" performs multiplication via a shift-and-add loop.

Internally, both inputs are resized to 14 bits to allow intermediate growth during addition/subtraction/multiplication, and the multiplication iterates over the bits of IN1: for each set bit IN1(i), the ALU adds IN2 shifted left by i into an accumulator. This is a direct, minimal-hardware way to express multiplication in behavioral VHDL.

The key architectural contract is at the output: the ALU always returns only the lower 7 bits of the 14-bit intermediate result. In other words, arithmetic is effectively performed modulo (2^7) at the architectural boundary. That choice is consistent with the project’s 7-bit scope, but it also means overflow is handled by truncation rather than saturation or flagging.

shift add multiply

Figure 2 — Conceptual shift-and-add multiplication accumulates (IN2 << i) for each set bit IN1[i] into a 14-bit sum, then returns only the lower 7 bits as ALURes[6:0].

ROM and “program as VHDL” workflow (Memory.vhd)

The memory is implemented as a 128-entry ROM (instruction(127 downto 0)), addressed by the 7-bit program counter. The output is a direct combinational lookup: Data <= instruction(to_integer(unsigned(address))). The ROM contents are currently defined by assigning specific indices inside the VHDL architecture. This matches your intended workflow: use the Python assembler to generate 7-bit binary instruction words and then paste those encodings into Memory.vhd to run them in simulation.

The file also includes multiple annotated program variants. One example sequence is commented as an “add 7 with 4” demonstration, and another is structured as a small loop intended to exercise conditional branching and repeated arithmetic. A third variant (commented out) is positioned as a “hardware focus” multiplication path, contrasting with the loop-based approach. From an engineering perspective, keeping these snippets inline makes the simulation loop fast, but it also means “program loading” is manual and tightly coupled to the ROM source code rather than being a separate artifact (e.g., a memory initialization file).

Figure placement: A code figure that shows a short ROM snippet (a few consecutive instruction(i) <= "......."; lines) is useful here to make the “assembler output -> ROM initialization” boundary concrete.

Assembler and the hardware–software boundary

To make the processor usable as a co-design exercise rather than a pure hardware artifact, I included a small Python assembler (Assembler/Conversion.py) that translates assembly-like lines into binary strings that can be loaded into the ROM. The intent, as documented in the repository, is to run the conversion step first, then paste the produced encodings into Memory.vhd, and finally validate behavior in simulation by inspecting the program counter, register values, and ALU outputs.

The current assembler implementation is deliberately minimal: it tokenizes each line by removing commas and splitting on whitespace, looks up an opcode mnemonic in a small table, and then encodes operands by type. Register operands (R0R3) are encoded as 2-bit binary values, while any non-register operand is encoded as a 4-bit binary value. Each instruction line is therefore built by concatenating a fixed-width opcode field with one or more fixed-width operand fields, producing a binary string per line.

This assembler is also where the most important integration contract lives: the binary it emits must match the instruction word format the VHDL control unit expects. The README states the processor operates on 7-bit-wide instructions and provides an example encoding (ADD R1, R2 -> 0100010). In the current Conversion.py, however, the opcode table is 2 bits wide and only covers Load, ADD, SUB, and JNZ, with no explicit MULTIPLY support. In practice, that means the assembler represents the intended direction (software producing ROM-ready bits), but the exact bit-level encoding contract is something the project has to pin down consistently between README, assembler, and the VHDL decode logic. That “tight loop” of adjusting encodings until the fetch/decode/execute behavior matches expectations is part of the educational value of the co-design workflow.

Two targeted questions so I can describe the integration contract precisely in Section 6 (Results) and avoid guessing:

Key implementation notes

  • Source grounding: the narrative is based on README.md and the project snapshot you provided.
  • Entry points: hardware at src/Processor.vhd (top-level integration); software at Assembler/Conversion.py (assembly-to-binary conversion).
  • Core modules: src/ALU.vhd, src/control_unit.vhd, src/Memory.vhd, src/PC.vhd, src/IR.vhd, src/Reg.vhd, src/MUX2x1.vhd, src/MUX4x1.vhd.
  • Top-level integration: src/Processor.vhd instantiates and wires Reg, PC, IR, ALU, MUX4x1 (twice), MUX2x1, Memory, and control_unit, with a single internal bus (RIN <= BUSout) feeding all loadable elements.
  • Control surface: src/control_unit.vhd outputs LD0..LD3, LDIR, LDPC, INC, BUS_Sel, plus CMD, Sel0, and Sel1, and consumes ROUTIR and the per-register zero signals ZR0..ZR3.
  • Halt sentinel: the controller treats 1111111 as a dedicated halt instruction and transitions into a terminal self-loop state.
  • Reg.vhd: rising-edge storage with LD; ZR=1 iff the stored 7-bit value is 0000000.
  • PC.vhd: 7-bit counter with CLR (async clear), LD (load from bus), and INC (increment); supports “load then increment” if both asserted.
  • IR.vhd: rising-edge instruction latch controlled by LD.
  • MUX2x1.vhd: bus-source selector between ROM (I0) and ALU (I1) with a single select bit.
  • MUX4x1.vhd: operand selector over R0R3 driven by two select bits.
  • ALU.vhd: unsigned add/sub; multiply implemented via shift-and-add; output is truncated to the low 7 bits.
  • Memory.vhd: 128×7 ROM as an internal array with explicit per-address assignments; output is a combinational lookup addressed by PC.
  • Assembler entry point: assemble(assembly_code) consumes a multi-line string and returns a list of binary strings, one per parsed instruction line.
  • Assembler tokenization: commas are stripped (line.replace(",", "")), then tokens are split on whitespace; empty lines are ignored.
  • Assembler encoding: registers (R*) become 2-bit fields; non-register operands become 4-bit fields; the opcode is taken from opcode_table.
  • Assembler opcode coverage: Load, ADD, SUB, JNZ are defined; other instructions (including MULTIPLY) are not represented in the table.
  • Hardware inspection points: Processor exports R0outR3out explicitly, which makes it practical to validate instruction effects without adding extra debug modules.
  • Software-to-hardware boundary: assemble(...) emits binary strings from assembly-like lines; in the validated workflow these are used to populate the ROM in Memory.vhd.
  • Intended ISA surface: the README presents LOAD/ADD/SUB/JNZ plus an extended MULTIPLY, and frames validation as monitoring ALU output, register values, and program counter progression during simulation.
  • Documentation positioning: the README positions the project explicitly as a simulation-driven, educational processor build with a minimal ISA and a Python conversion step.
  • Encoding contract hotspot: the assembler’s opcode table and assemble(...) are the natural enforcement point for a single instruction-format contract once the bit layout is finalized.

Results

Because I did not build a dedicated VHDL testbench, validation for this project is based on interactive simulation: compiling the full design, loading a short program into the ROM, and then stepping the clock while inspecting the program counter, instruction register, control signals, ALU result, and the four register outputs. This approach matches the project’s educational scope: the primary outcome is a working hardware–software loop where I can translate assembly into binary, paste those encodings into the ROM, and observe the machine executing fetch–decode–execute in a waveform viewer.

Validation checkpoints

In practice, “success” in simulation is visible as a small set of repeatable checkpoints:

  • Fetch discipline: on each instruction boundary, the instruction register captures the ROM output while the program counter advances, yielding a stable next instruction word and a monotonic PC sequence.
  • Load path correctness: a LOAD sequence routes ROM data onto the internal bus and latches it into the selected register, so the register output changes exactly on the intended clock edge.
  • ALU path correctness: ADD and SUB route the ALU result onto the bus and latch it back into a register; the ALU output changes combinationally with operand selection, while architectural state changes only on clock edges.
  • Multiply behavior: the MULTIPLY operation produces a deterministic product consistent with a shift-and-add implementation, with the architectural output constrained to 7 bits (i.e., truncation on overflow) as part of the 7-bit design scope.
  • Conditional control flow observability: conditional branching is validated by correlating (a) the selected register value, (b) its zero flag, and (c) whether the PC is loaded from ROM or advanced past the next word. This makes the branch mechanism debuggable even without a testbench, because the condition and the control effect are both visible.

Artifacts produced

The durable artifacts from a run are simple but useful: (1) binary instruction words produced by the Python assembler and (2) waveform traces in the simulator that show the PC/IR/control/ALU/register timeline for a program. The repository also contains simulator-side artifacts (e.g., waveform databases) under src/, which is consistent with an interactive debug workflow rather than a scripted regression setup.

Discussion

This project’s strongest property is that it forces a clean interface between hardware intent and software representation. The processor design is small enough that I can reason about every signal transition, but complete enough to exercise real co-design constraints: instruction encoding decisions affect decode logic; decode logic constrains what the assembler must emit; and the ROM loading workflow becomes part of the “system contract,” not a separate afterthought.

That said, the absence of a testbench is a real limitation. Interactive waveform inspection is effective for bring-up and learning, but it does not scale to repeatable regression. Without an automated test harness, it is easy to introduce subtle contract drift for example, changes in instruction bit layout, operand field meaning, or zero-flag conventions without immediately noticing. The README asserts that the assembler “supports all implemented instructions,” but the current Conversion.py opcode table only enumerates Load, ADD, SUB, and JNZ, and it encodes operands into fixed 2-bit (register) and 4-bit (immediate) fields, which may or may not match the 7-bit instruction format you ultimately used in ROM. In a co-design project, this kind of mismatch is common and also instructive but it is worth surfacing as a deliberate boundary to tighten.

The architectural constraints are also doing real work here. The 7-bit width means arithmetic overflow is not an edge case; it is a normal mode of operation, and truncation becomes the implicit overflow policy. The ROM-based memory model similarly compresses the problem: by treating “program and data” as a static table, I avoid a full load/store subsystem and can focus on sequencing and datapath correctness. The cost is that the system is simulation-oriented, and “loading a program” is effectively editing VHDL. For the stated educational goal, that trade-off is reasonable, but it is the first thing I would change if I wanted this design to behave more like a reusable platform.

What I would tighten next

If I were evolving this beyond a learning artifact, I would prioritize three reliability-oriented improvements:

  1. Lock the instruction contract: define a single authoritative bit layout (fields, widths, and operand meaning) and make the VHDL decode and the Python assembler share it (even if only by generating a common table/module).
  2. Add a minimal self-checking testbench: one or two short programs with assertions on PC/register end state would turn interactive validation into repeatable regression.
  3. Separate program data from RTL: move ROM initialization into a file-based mechanism supported by the simulator (or at least generate Memory.vhd program blocks automatically from the assembler output) to reduce manual copy/paste drift.

Conclusion

I built this 7-bit processor as a compact hardware–software co-design exercise: a minimal ISA, a VHDL implementation with a clear separation between datapath and control, and a Python assembler that translates human-readable instructions into ROM-ready binary. The design is intentionally constrained 7-bit width, ROM-based memory, and a small instruction set so that the full fetch–decode–execute behavior remains understandable in simulation. Within that scope, the project demonstrates the engineering mechanics that matter in larger systems: defining module contracts, sequencing state updates cleanly, and keeping the software encoding pipeline consistent with hardware decode expectations.

The next step, if I want to make it more robust, is not to add features first; it is to formalize the instruction-format contract and add a minimal self-checking testbench so that the co-design boundary becomes repeatable and verifiable rather than primarily manual.

References

[1] S. Sojudi Abdee Fard, “7-Bit Custom Processor Design for Hardware-Software Co-Design,” GitHub repository (semester 8 / 7-Bit Custom Processor Design). https://github.com/sabers13/bachelor-projects/tree/main/semester%208/7-Bit%20Custom%20Processor%20Design

[2] IEEE Standards Association, “IEEE 1076-2019 IEEE Standard for VHDL Language Reference Manual,” Dec. 23, 2019. https://standards.ieee.org/ieee/1076/5179/

[3] Advanced Micro Devices, Inc., Vivado Design Suite User Guide: Logic Simulation (UG900), v2024.2, Nov. 13, 2024.https://docs.amd.com/r/2024.2-English/ug900-vivado-logic-simulation

[4] Siemens EDA, “ModelSim User’s Manual,” software version 2024.2 (PDF). https://ww1.microchip.com/downloads/aemDocuments/documents/FPGA/swdocs/modelsim/modelsim_user_2024_2.pdf

[5] Python Software Foundation, “Python 3 Documentation,”. https://docs.python.org/

Revolutionizing Construction: 7 Powerful Ways AI and BIM Integration Are Transforming the Industry

Revolutionizing Construction: 7 Powerful Ways AI and BIM Integration Are Transforming the Industry

Estimated Reading Time: 10 minutesThis article presents an in-depth exploration of the integration of Artificial Intelligence (AI) and Building Information Modeling (BIM) as a transformative force in the construction industry. It highlights how machine learning algorithms, IoT systems, and generative design are redefining traditional BIM workflows—shifting from static digital modeling to dynamic, predictive, and self-optimizing systems. Key applications include automated clash detection, predictive maintenance, energy efficiency modeling, and real-time construction monitoring using drones and sensors. The paper addresses technical challenges such as data interoperability and workforce upskilling while showcasing global case studies that demonstrate measurable improvements in cost, safety, and operational efficiency. Ultimately, the article argues that AI and BIM integration marks a new paradigm—essential for achieving intelligent infrastructure and competitive advantage in a data-driven construction future.

The Psychology of Rural Event Planning: Challenges and Opportunities

The Psychology of Rural Event Planning: Challenges and Opportunities

Estimated Reading Time: 12 minutes

Events in rural areas face unique conditions that can significantly influence how they are planned, promoted, and perceived by participants. From agricultural fairs to local festivals and community gatherings, rural events reflect the cultural identity, social networks, and resource constraints of each distinct region. This article explores the psychological dimensions behind organizing, hosting, and attending events in rural contexts, highlighting how tight-knit communities, geographic isolation, and shared traditions shape participant motivation and satisfaction. It also uncovers the hurdles event planners often encounter—such as limited infrastructure, smaller audiences, and logistical complexities—and demonstrates how to address them effectively. Through a discussion of real-world examples and evidence-based strategies, the article offers insights on creating events that resonate with local values, build communal bonds, and stimulate regional development. In concluding, it examines future perspectives on rural event planning in an era of digital connectivity, stressing the need to balance innovation with respect for local heritage.
By Samareh Ghaem Maghami, Cademix Institute of Technology

Introduction

Rural areas around the globe host a wide range of events—community fairs, agricultural exhibitions, cultural festivals, outdoor concerts, and seasonal markets, among others. These gatherings often serve as a nucleus for social engagement, celebrating local traditions and providing vital economic opportunities. While they can be comparable in concept to urban events, the rural context introduces distinct cultural, economic, and psychological factors that influence planning and outcomes.

Event planners accustomed to metropolitan settings may find themselves facing entirely new challenges in rural areas, such as limited transportation infrastructure, smaller participant pools, and tight-knit social networks. Conversely, rural contexts can also grant unique advantages, including a profound sense of community, deep historical ties, and abundant natural beauty. Recognizing and adapting to these elements allows organizers to develop events that have a genuine impact—fostering social ties, stimulating tourism, and preserving or even reviving local culture.

The psychological dimension is central to understanding rural event planning. People living in smaller or more isolated communities often have strong interpersonal bonds, closely held traditions, and a high regard for communal identity. When events reflect these attributes, they can secure a level of buy-in and loyalty that might be harder to achieve in urban contexts. On the other hand, if event organizers fail to align with local values or attempt to impose an “outsider” vision, they can face skepticism or apathy. This article outlines how psychology informs everything from marketing strategies to venue selection, offering a roadmap for planners seeking to create meaningful and enduring engagements in rural settings.


Unique Characteristics of Rural Settings

Community Ties and Trust

One of the defining traits of rural life is the importance of strong interpersonal relationships. Neighbors often know each other well, and multi-generational families may reside within close proximity. Such connections foster an environment where reputations carry substantial weight, and trust is crucial. For event planners, this means word-of-mouth recommendations and personal endorsements may hold more sway than formal advertising campaigns. When influential community members or local institutions support an event, it can rapidly gain credibility among residents. However, violating community trust—perhaps through mismanagement of resources or broken promises—can have long-lasting repercussions.

Physical and Digital Isolation

While many rural regions experience physical isolation due to limited transport networks, digital connectivity remains inconsistent. Broadband services might be less reliable or slower, influencing how news and promotional materials are disseminated. This partial digital isolation can pose challenges for large-scale online marketing or real-time event updates, especially if the community prefers traditional communication channels like flyers, local newspapers, or radio broadcasts. Yet, with the gradual improvement in digital infrastructure, social media platforms and community forums are playing an increasing role in spreading information and bringing people together.

Economic Realities

Rural economies often rely on agriculture, small businesses, or specialized industries such as forestry, mining, or tourism. Disposable income and sponsorship opportunities may be more limited compared to urban centers. Consequently, events need to justify their value both to participants—who might weigh attendance against other priorities—and to potential sponsors, who may be wary of a smaller audience reach. This economic context can lead to a greater emphasis on cost-sharing, volunteer efforts, or community-driven fundraising to keep event ticket prices accessible.

Closeness to Nature

The natural environment is a prized resource in many rural areas. Rolling farmland, forests, or mountainous backdrops can be integral to the event experience, offering scenic value or unique outdoor activities. With this comes an added layer of logistics—weather patterns, wildlife considerations, or environmental regulations may shape the feasibility and timing of events. Yet, the rural setting’s natural beauty can be a powerful draw, particularly for city dwellers seeking a reprieve from urban life. Strategically incorporating natural elements into the program design can enhance the emotional impact and create a memorable experience.

Cultural and Historical Depth

Some rural communities have preserved traditions and lifestyles that trace back decades or even centuries. These historical threads help form the backbone of communal identity. Events can tap into this cultural richness by featuring local crafts, storytelling, folk music, or cuisine. Aligning a festival’s theme with cherished traditions fosters a sense of pride and belonging. At the same time, it is essential to remain sensitive to evolving norms and outside influences—balancing the desire for authenticity with an openness to innovation.


Psychological Factors Influencing Participation

Sense of Belonging and Community Pride

In rural areas, the event experience often goes beyond entertainment; it reaffirms communal bonds. Attending a local festival or fair means supporting friends, neighbors, or local organizations. This sense of belonging can be a powerful motivator, encouraging even those who might have limited disposable income or face logistical barriers to show up. The flip side is that if an event does not resonate with community identity—or worse, appears to undermine local values—residents may reject it outright. Planners need to demonstrate authenticity by involving community stakeholders early on and incorporating local voices in everything from programming to venue decor.

Social Validation and Word-of-Mouth Dynamics

Rural social circles can be tightly interwoven, meaning the perceived success or popularity of an event can hinge on the endorsements of influential individuals. Testimonials, personal invites, and casual conversations over morning coffee can all serve as potent promotional tools. In some cases, the “bandwagon effect” is heightened because people do not want to feel excluded from a shared community experience. By ensuring positive early interactions—perhaps through a pilot event or a small gathering with respected local figures—planners can generate a wave of enthusiasm that reverberates through word-of-mouth channels.

Accessibility and Comfort Zones

Potential attendees might have concerns about accessibility—whether due to physical distance, limited public transportation, or a personal reluctance to venture outside familiar settings. Psychological comfort can be a significant factor, especially if an event aims to introduce innovative ideas or attract external visitors. Some locals may fear that large crowds or unfamiliar entertainment could dilute their community’s identity. Conversely, outsiders might hesitate to travel to a region they perceive as remote or insular. Addressing these concerns openly—through clear directions, group travel options, or reassuring messaging—can reduce anxiety and encourage broader participation.

Nostalgia and Emotional Resonance

Rural events often tap into nostalgia: memories of childhood, family traditions, or simpler times. This emotional resonance can be a key driver of attendance. For example, a harvest festival might remind older residents of past celebrations tied to the farming cycle, while younger generations get a glimpse of their cultural heritage. Planners can leverage this nostalgia by incorporating traditional music, vintage exhibits, or intergenerational activities, all of which anchor the event in collective memory. Yet, it is important to strike a balance with current trends, ensuring the event also appeals to modern tastes and interests.

Perceptions of Safety and Familiarity

Many rural communities place high value on personal safety, closeness, and stability. Large-scale events or those that introduce unfamiliar components—such as exotic food vendors or non-local musical acts—can trigger apprehension. Showcasing safety measures, collaborating with local authorities, and offering “preview” snippets or demos can help ease concerns. Equally significant is the sense of emotional safety. Attendees should feel free to express themselves, explore new ideas, or connect with outside visitors without fear of judgment. When events provide an environment where curiosity and hospitality intersect, they reinforce participants’ psychological comfort and willingness to engage.


Strategies for Effective Event Planning

Inclusive Stakeholder Involvement

Engaging local stakeholders from the outset is crucial. This may include community leaders, business owners, farmers, and residents who can offer valuable perspectives on local norms and logistical constraints. Forming a planning committee that reflects the community’s diversity—age groups, cultural backgrounds, professional sectors—ensures that multiple viewpoints are considered. Including youth representatives, for instance, can bring fresh ideas to a heritage-based festival, helping balance tradition with innovation. Early consultation fosters transparency, mitigating rumors or misunderstandings that can undermine trust.

Contextual Marketing and Promotion

Events in rural areas often rely on personalized, relationship-based promotion. Instead of generic mass advertising, planners might leverage local radio stations, bulletin boards in community centers, or flyers posted in grocery stores and cafes. Social media can still play a role, particularly among younger demographics, but messages should be aligned with local sensibilities. Storytelling approaches—like a short video featuring residents explaining why the event matters—often resonate deeply. Highlighting shared values, communal benefits, and traditions can strengthen emotional connections, whereas overly slick or corporate-style campaigns might raise skepticism.

Leveraging Local Assets

Rural communities can provide planners with unique venues and cultural resources. Barns, town squares, historical churches, or natural landscapes can serve as compelling backdrops for events. Local artisans, bakers, or musicians can contribute authentic touches that align with community pride. Even practical items, like farm equipment or horses, can be incorporated if they fit thematically. These local elements anchor the event experience in something distinctly tied to the region. Building on what is already available—and acknowledging the expertise of local people—also reduces expenses and fosters buy-in.

Cross-Generational Programming

Because rural communities often encompass multiple generations living side by side, event activities should cater to a broad demographic spectrum. Seniors might appreciate lectures or exhibits focusing on local history, while younger attendees gravitate toward interactive games, sports tournaments, or live music. Workshops that bring different age groups together—like a craft session where elders teach traditional skills—can encourage intergenerational bonding. By blending traditional forms of entertainment with contemporary offerings, the event stands a better chance of appealing to families and individuals with diverse interests.

Partnerships and Collaboration

Rural event planners may need to collaborate with local NGOs, governmental agencies, or regional tourism boards to secure funding and logistical support. Many governments and non-profit entities provide grants to initiatives that promote culture, community health, or economic development in rural areas. Partnerships can also extend beyond the local region, particularly if the aim is to attract visitors from nearby cities or other states. Joint marketing campaigns that highlight scenic drives, regional attractions, or culinary tours can entice urban dwellers looking for a different experience. Coordinating with local businesses ensures that attendees have access to amenities like lodging, dining, and transportation, thereby enhancing overall satisfaction.

Sustainability and Environmental Responsibility

Given the close relationship between rural communities and their natural surroundings, demonstrating environmental stewardship can significantly enhance an event’s reputation. Simple measures—like offering recycling stations, using biodegradable packaging, or partnering with local farmers for food supplies—can signal respect for the land and align with eco-conscious values. Some rural areas might also be sensitive ecosystems, so careful planning to minimize ecological impact fosters goodwill with both residents and environmental advocates. Moreover, visitors seeking “green” or low-impact travel may be drawn to events that showcase sustainable best practices.

Contingency Planning

Rural environments are sometimes more vulnerable to weather extremes, road closures, or power outages. Preparing contingency plans—like shifting an outdoor event to a covered barn or arranging generator backups—can save time, money, and community goodwill. Publicizing a clear communication protocol (e.g., local radio updates, text alerts) ensures attendees know what to expect in the event of a sudden change. By proactively addressing these variables, planners can reduce uncertainty and keep participant trust intact.


Measuring Impact and Future Perspectives

Assessing Attendee Satisfaction

Effectively measuring the success of a rural event extends beyond ticket sales or foot traffic. Planners should consider qualitative feedback—such as interviews, focus groups, or surveys—that capture participants’ emotional responses, sense of community pride, and willingness to attend similar events in the future. Online feedback forms can work when community members have reliable internet, but paper surveys or comment boxes at local gatherings may yield higher response rates in regions with limited connectivity. A genuine effort to incorporate this feedback into future planning cycles illustrates accountability and fosters a culture of continuous improvement.

Tracking Economic and Social Benefits

For many rural areas, events serve as catalysts for economic development, injecting revenue into local businesses and providing part-time employment opportunities. Beyond direct income from ticket sales or vendor fees, local shops, accommodation providers, and restaurants benefit when visitors come to town. Additionally, strong events can promote investment in infrastructure (such as improved roads or broadband) that yields lasting benefits. Socially, events might spark new friendships or community initiatives, strengthening local networks. Tracking these broader outcomes requires coordination with local authorities, business associations, and community organizations, but the data can be invaluable in shaping long-term development plans and justifying future funding.

Fostering Community Resilience

In rural settings, a successful event can transcend the immediate occasion, becoming a cornerstone of community identity and resilience. Regular festivals and gatherings cultivate a sense of continuity, helping preserve local traditions through periods of economic or social change. They can also serve as platforms for addressing communal challenges—from mental health awareness to agricultural innovation—by incorporating educational workshops or speaker sessions. Over time, these recurring events can build a reputation that extends beyond local borders, attracting tourism and forging partnerships with regional or even international organizations.

Embracing Digital Innovations

Even in areas with modest internet connectivity, digital tools can augment rural events by offering new forms of engagement. Livestreamed concerts or talks may capture the attention of distant audiences, while online ticketing systems can streamline management and data collection. Hybrid models, featuring on-site festivities combined with digital components for remote participants, can make the event accessible to friends and family who have moved away. Nevertheless, the psychological comfort of local attendees should remain a priority. A careful balance is needed so that digital innovations enhance rather than overshadow the communal atmosphere that is central to rural events.

Evolving Cultural Narratives

Rural communities are not static; they evolve as younger generations introduce new perspectives, and economic or environmental conditions change. Likewise, rural events must adapt to remain relevant. A harvest festival might pivot to highlight sustainable farming practices in response to climate concerns, or a traditional crafts fair could include modern art sections to appeal to youth. The ongoing challenge is to maintain authenticity while embracing growth. Successful planners engage locals in shaping the event’s future direction, ensuring the community feels a sense of ownership and sees the event as reflecting their collective identity rather than an imposed vision.


Conclusion

Event planning in rural areas requires a nuanced understanding of local culture, psychological motivators, and logistical constraints. These communities often prize authenticity, heritage, and interpersonal connections, making the success of an event contingent on its alignment with local values and its ability to foster genuine emotional resonance. Planners who delve into the social and psychological dimensions—by involving community members, leveraging word-of-mouth influence, and offering inclusive and meaningful programming—are better positioned to create experiences that are both memorable and impactful.

At their best, rural events serve as living expressions of a community’s identity and aspirations. They can generate economic opportunity, preserve cultural practices, and strengthen social bonds that define life in less urbanized regions. While challenges like limited infrastructure, isolation, and resource constraints are real, they can also be catalysts for creative solutions that enhance an event’s authenticity and sense of place. In a world that increasingly values connection and authenticity, rural areas have a golden opportunity to showcase their unique charm.

Looking ahead, rural event planners can harness improving digital tools to broaden reach while carefully preserving the intimate, communal essence that sets these gatherings apart. By grounding decisions in ethical principles, cultural respect, and a deep appreciation for local psychology, they can design events that not only succeed in the present but also lay the foundation for a thriving, adaptive future for rural communities. Ultimately, it is this blend of tradition and innovation—rooted in authentic human connection—that empowers rural events to leave a lasting imprint on both the people who call these places home and the visitors who come to learn, celebrate, and connect.